
Creating New Contacts
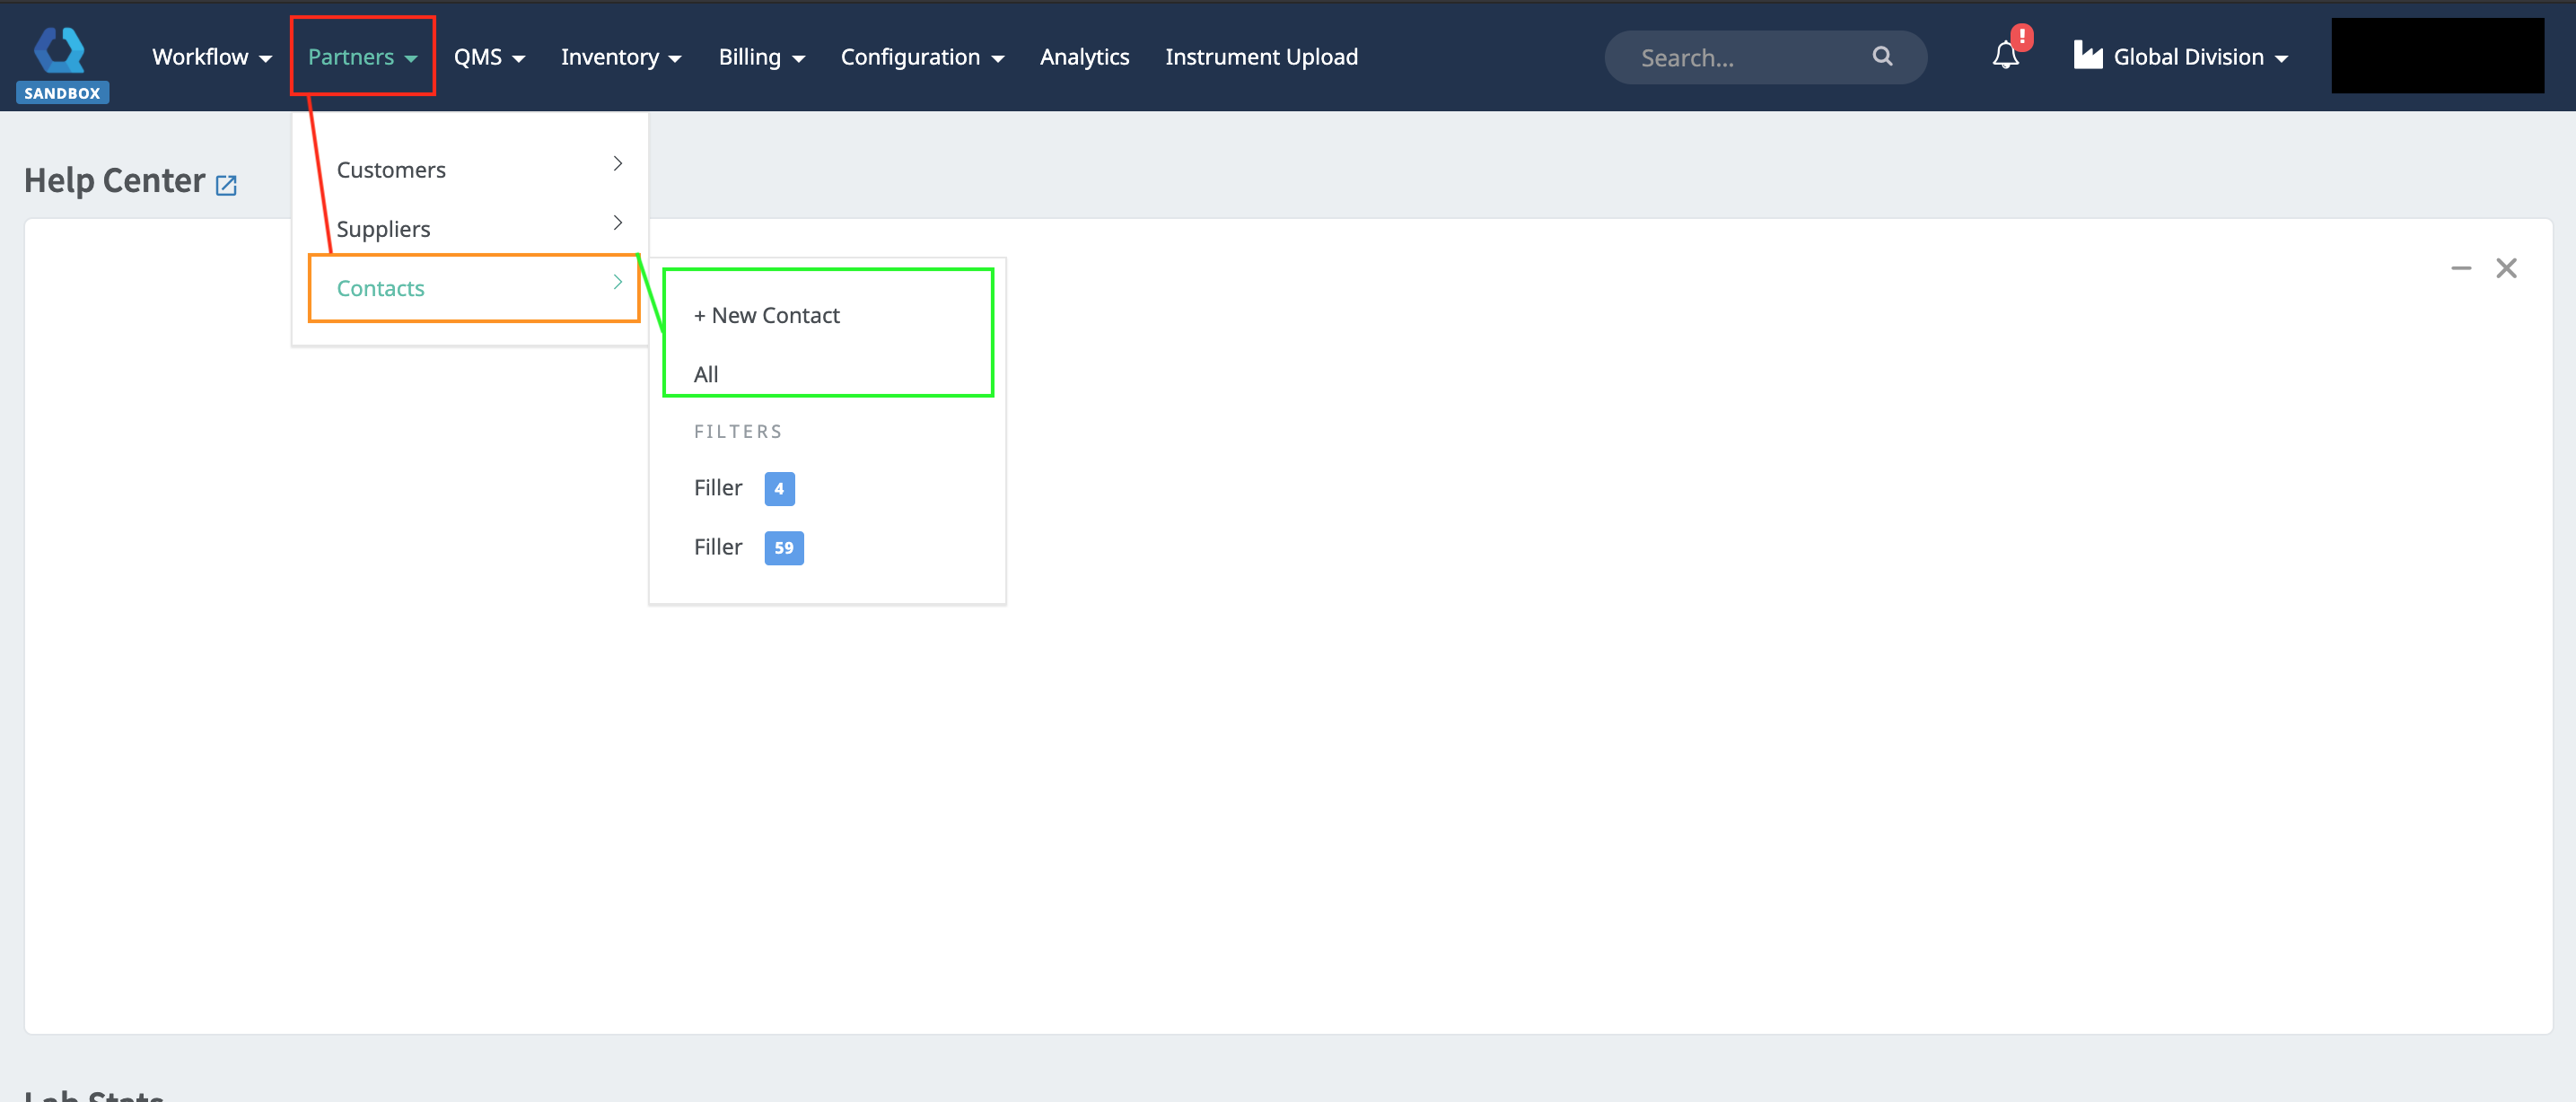
After you have logged in, click on the Partners Drop-Down tab and hover mouse over Contacts. Then you would have the option to Add Contacts (+New Contacts) or to View All Contacts, click on (All).
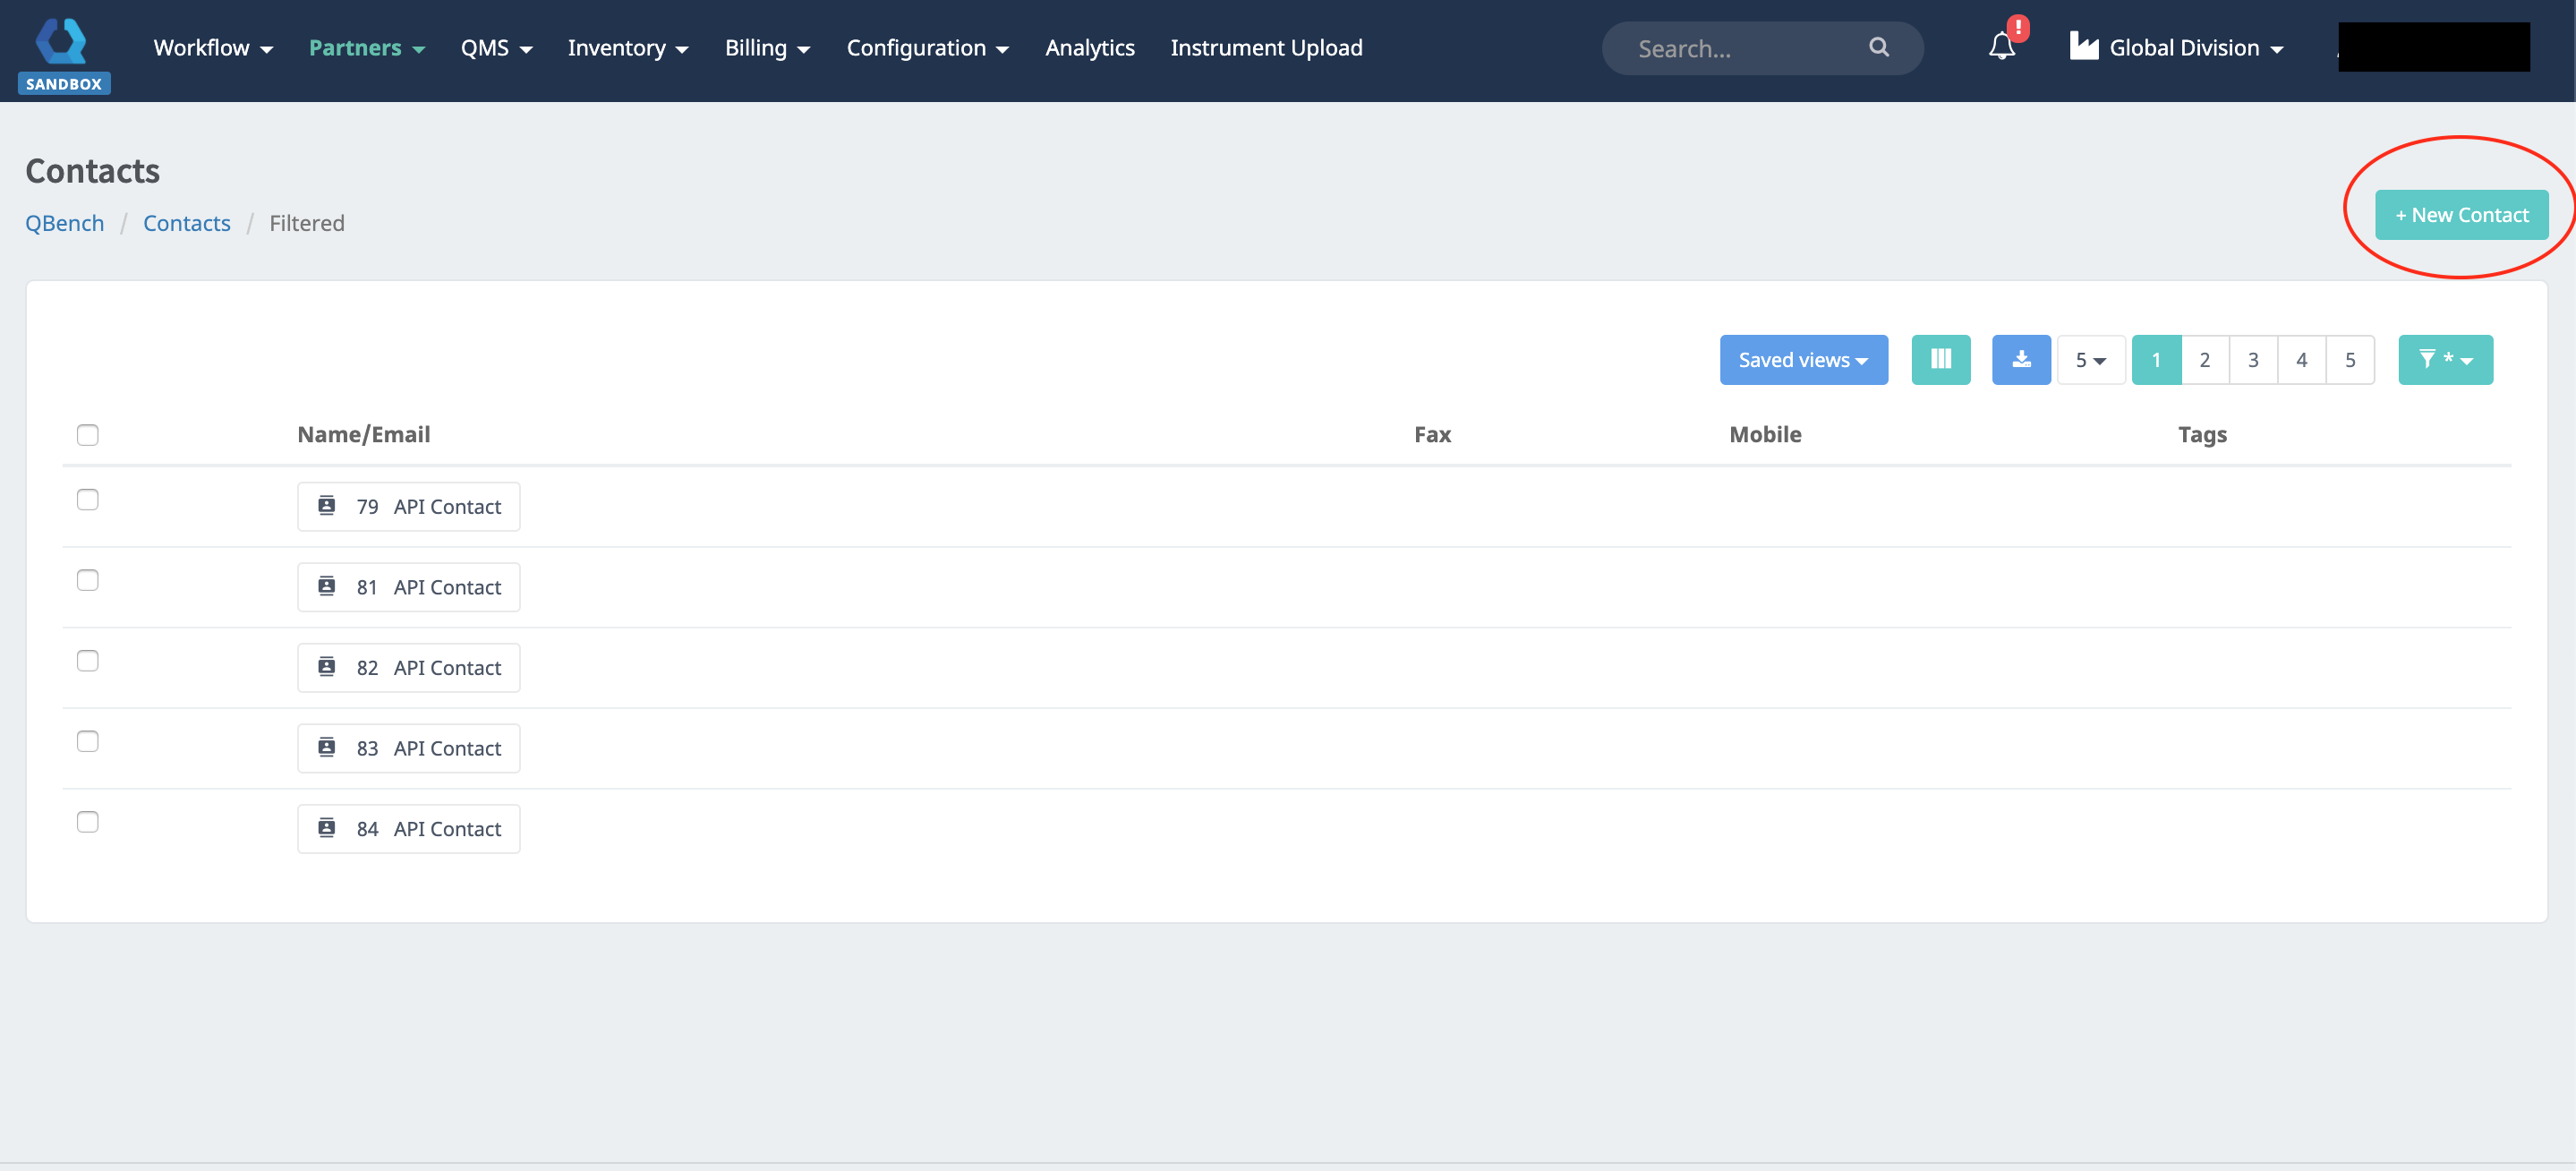
Adding Contacts Through the Contacts List Page
- Click on +New Contacts on the top right corner to Add Contacts through the Contacts List Page as shown below.
New Contacts
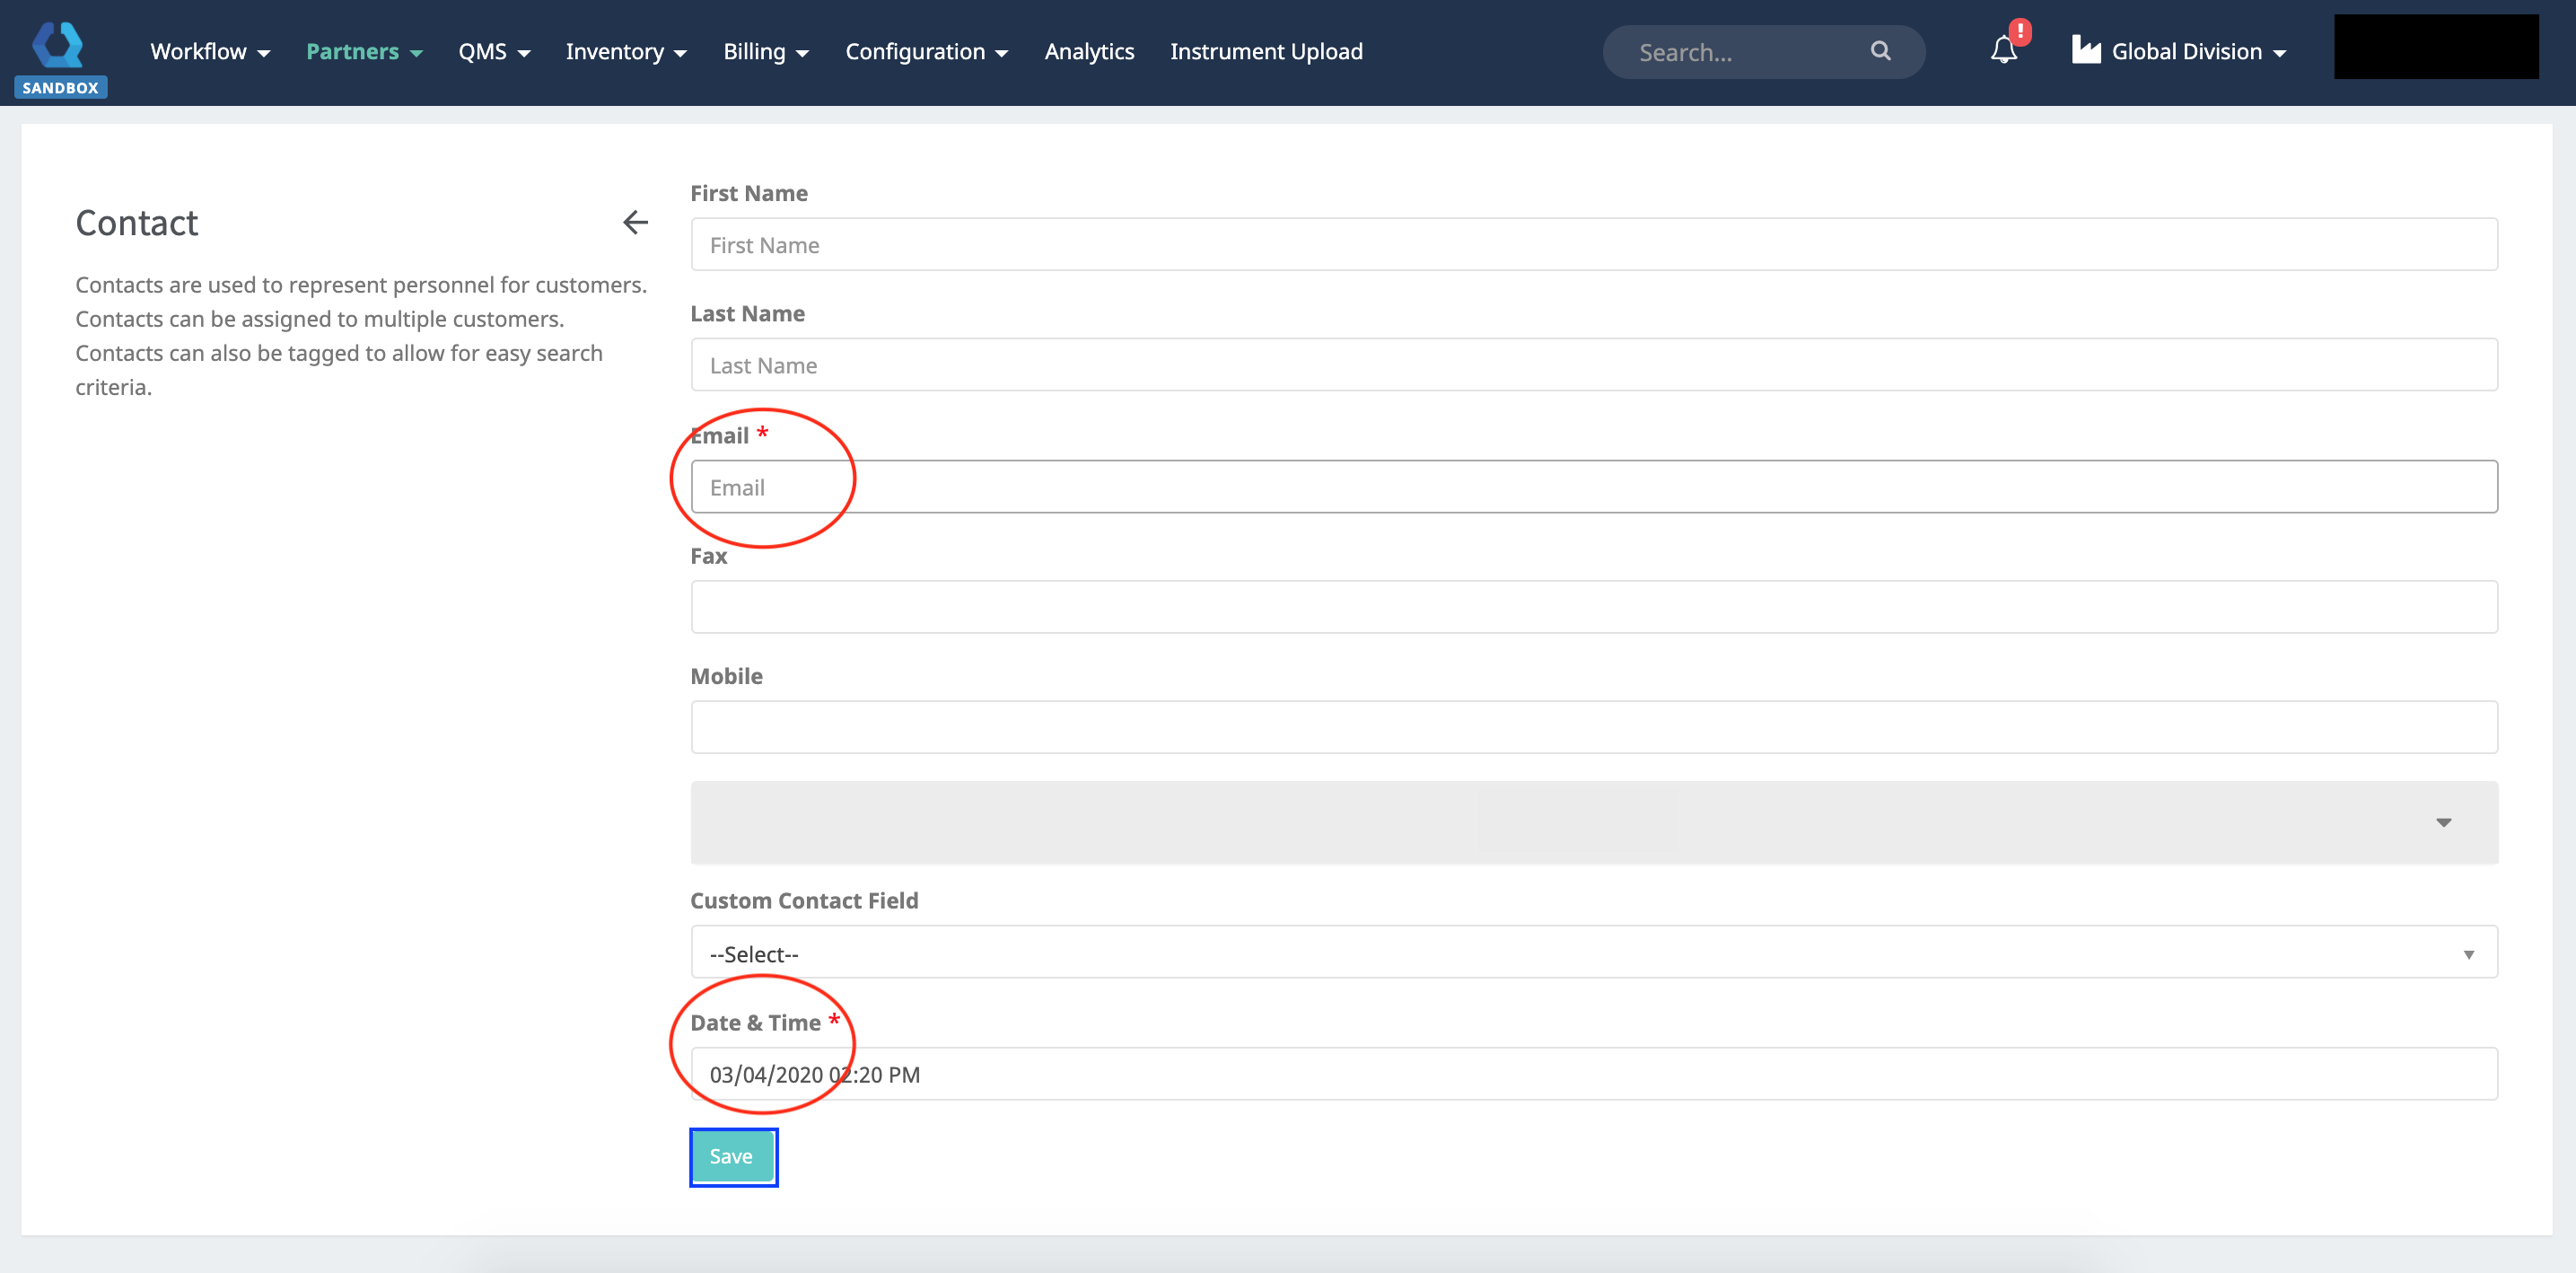
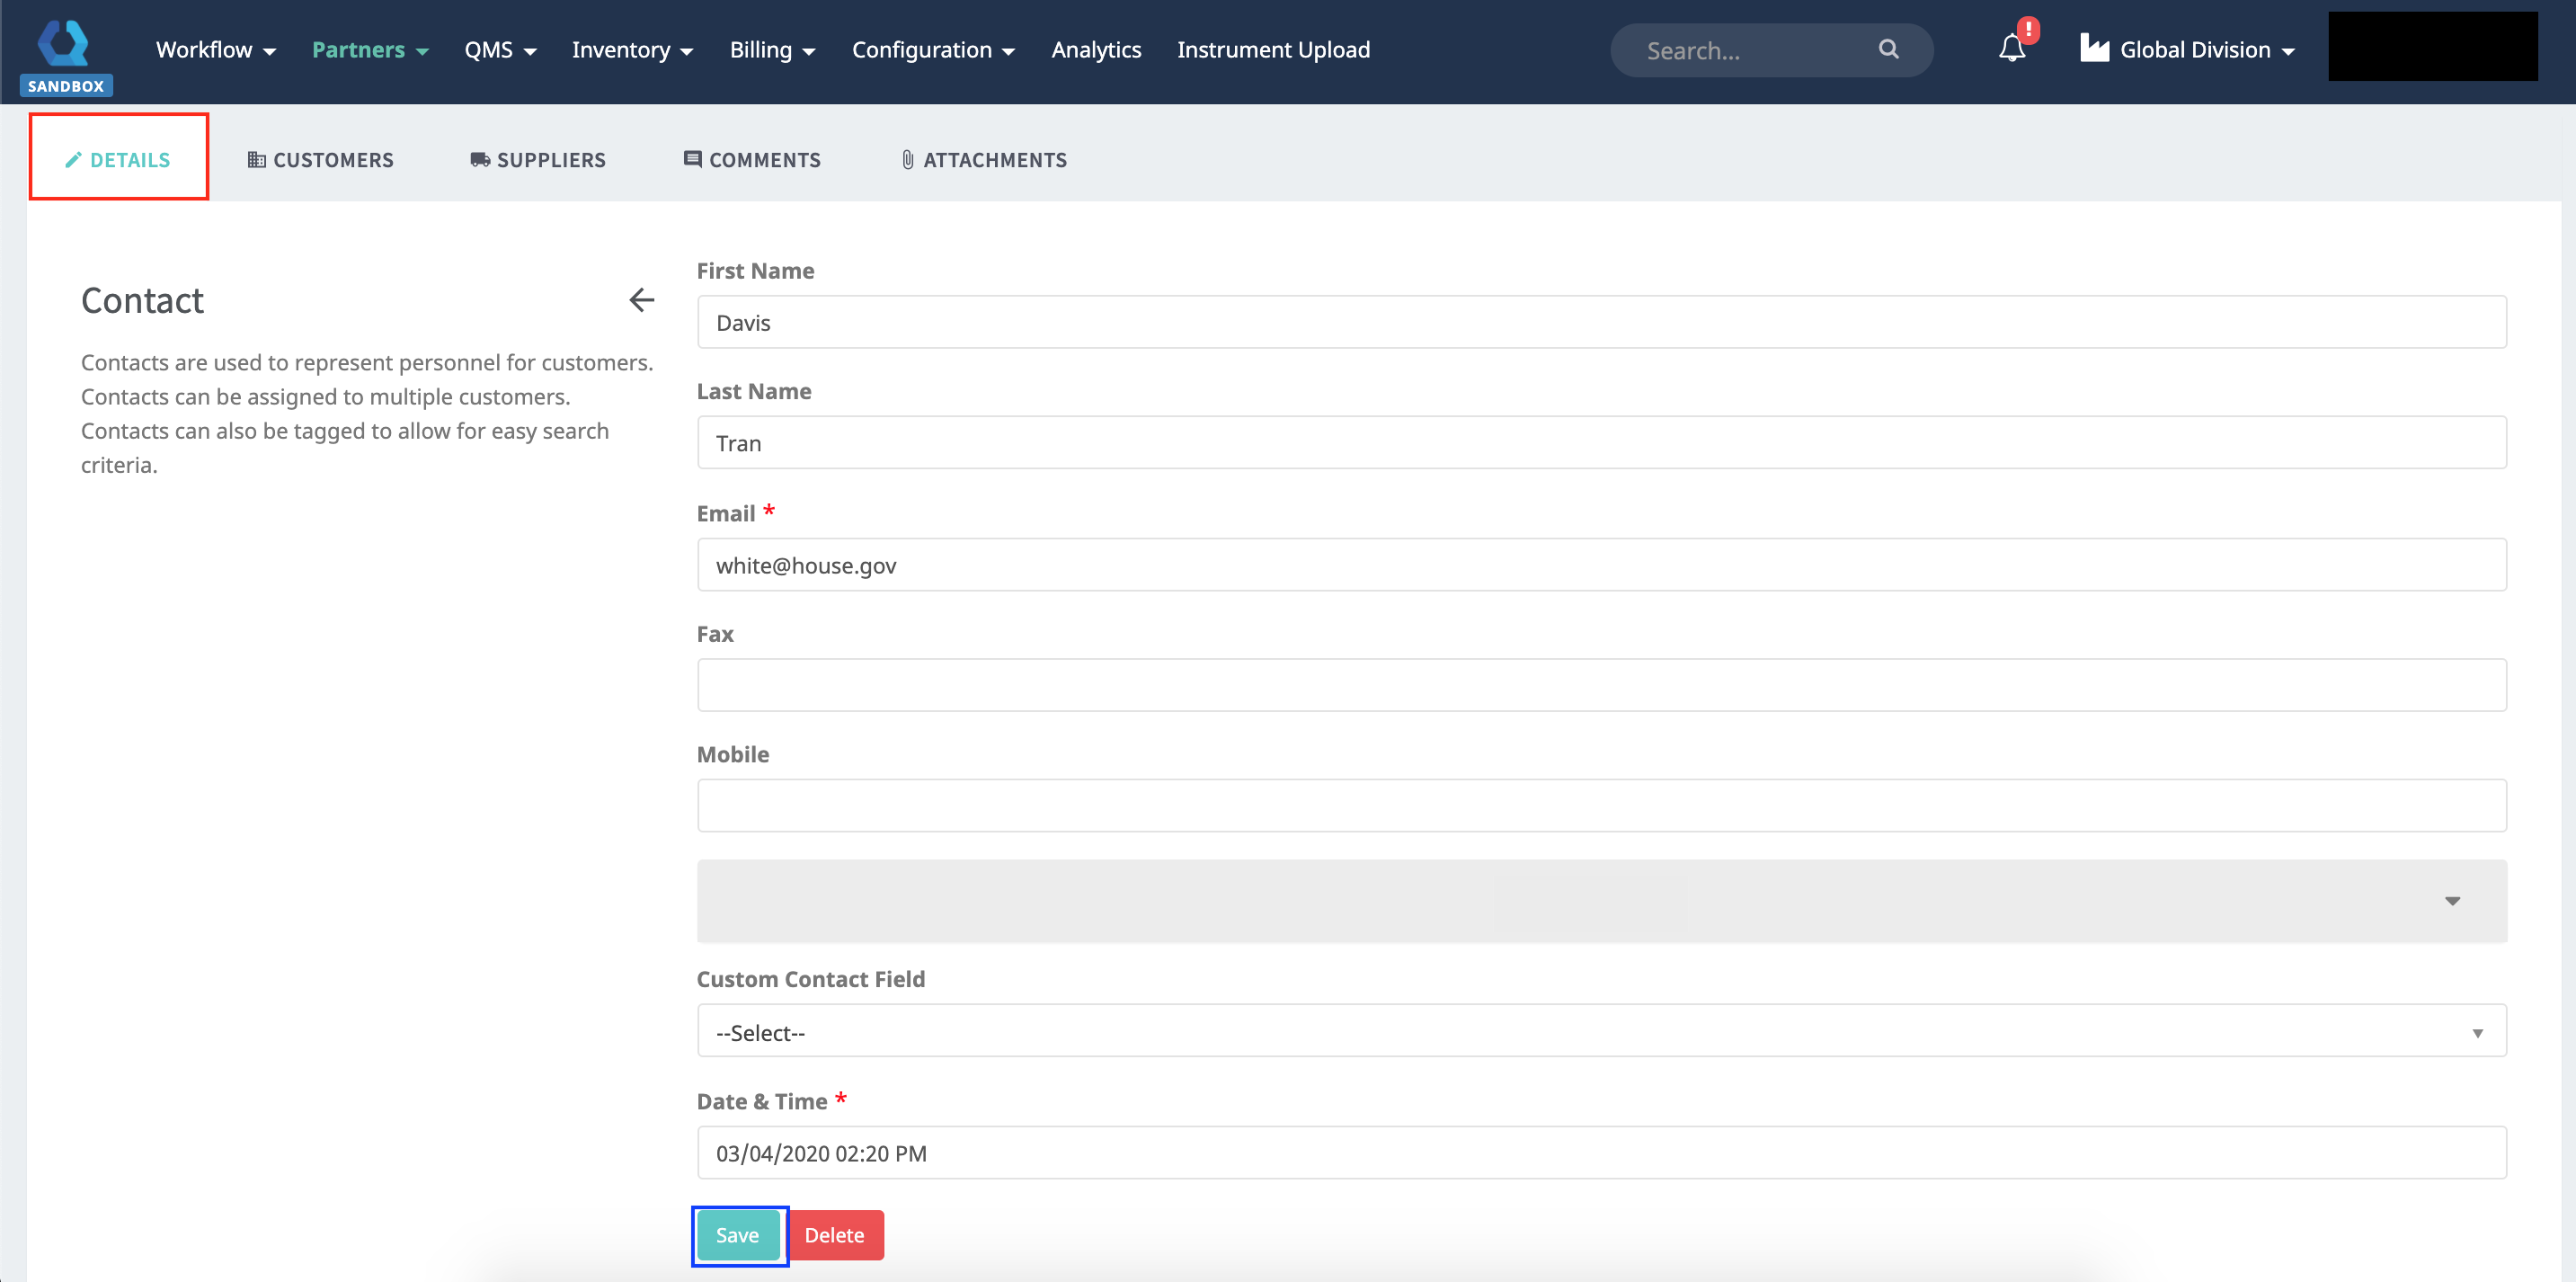
When a New Contact is created, you will be prompted to the screen below.
- Information about the Contact can be filled here. *Note: (Email and Date & Time) is a required field. Certain fields can be configured to be required.
- Once all information has been entered, click Save.
Contact Configuration
In the Contact Configuration Page, there are five different tabs (Details, Customers, Suppliers, Comments, Attachments). 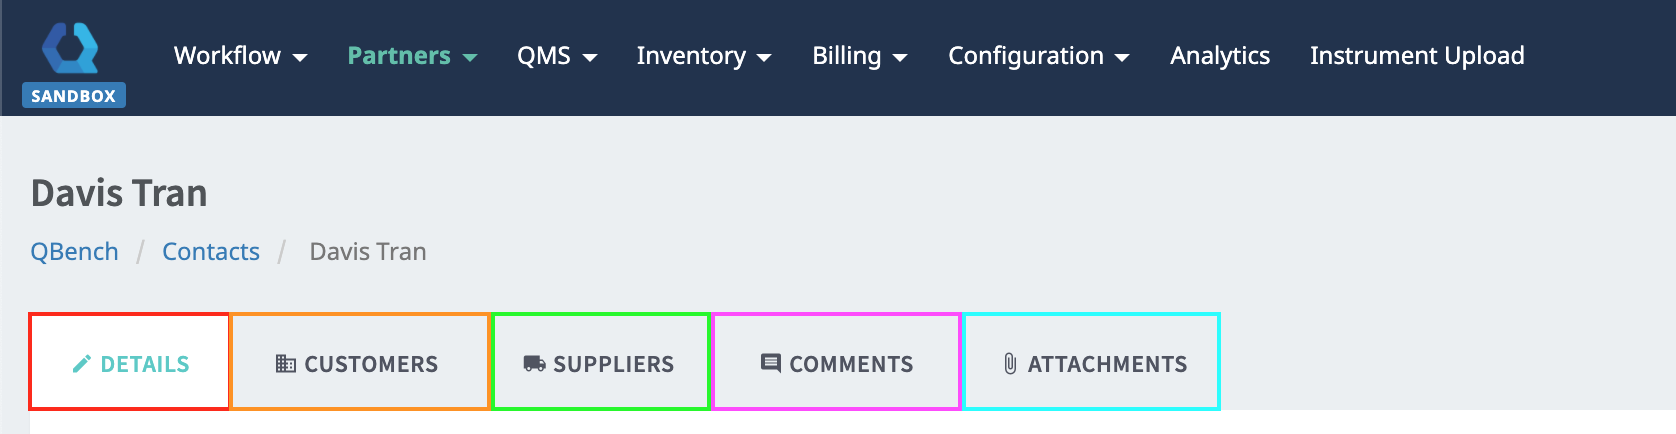
Details
- Information can be edited in the Contact Details Page.
- Once edits have been made, click Save.
- The Contact Details Page displays the information that was created.
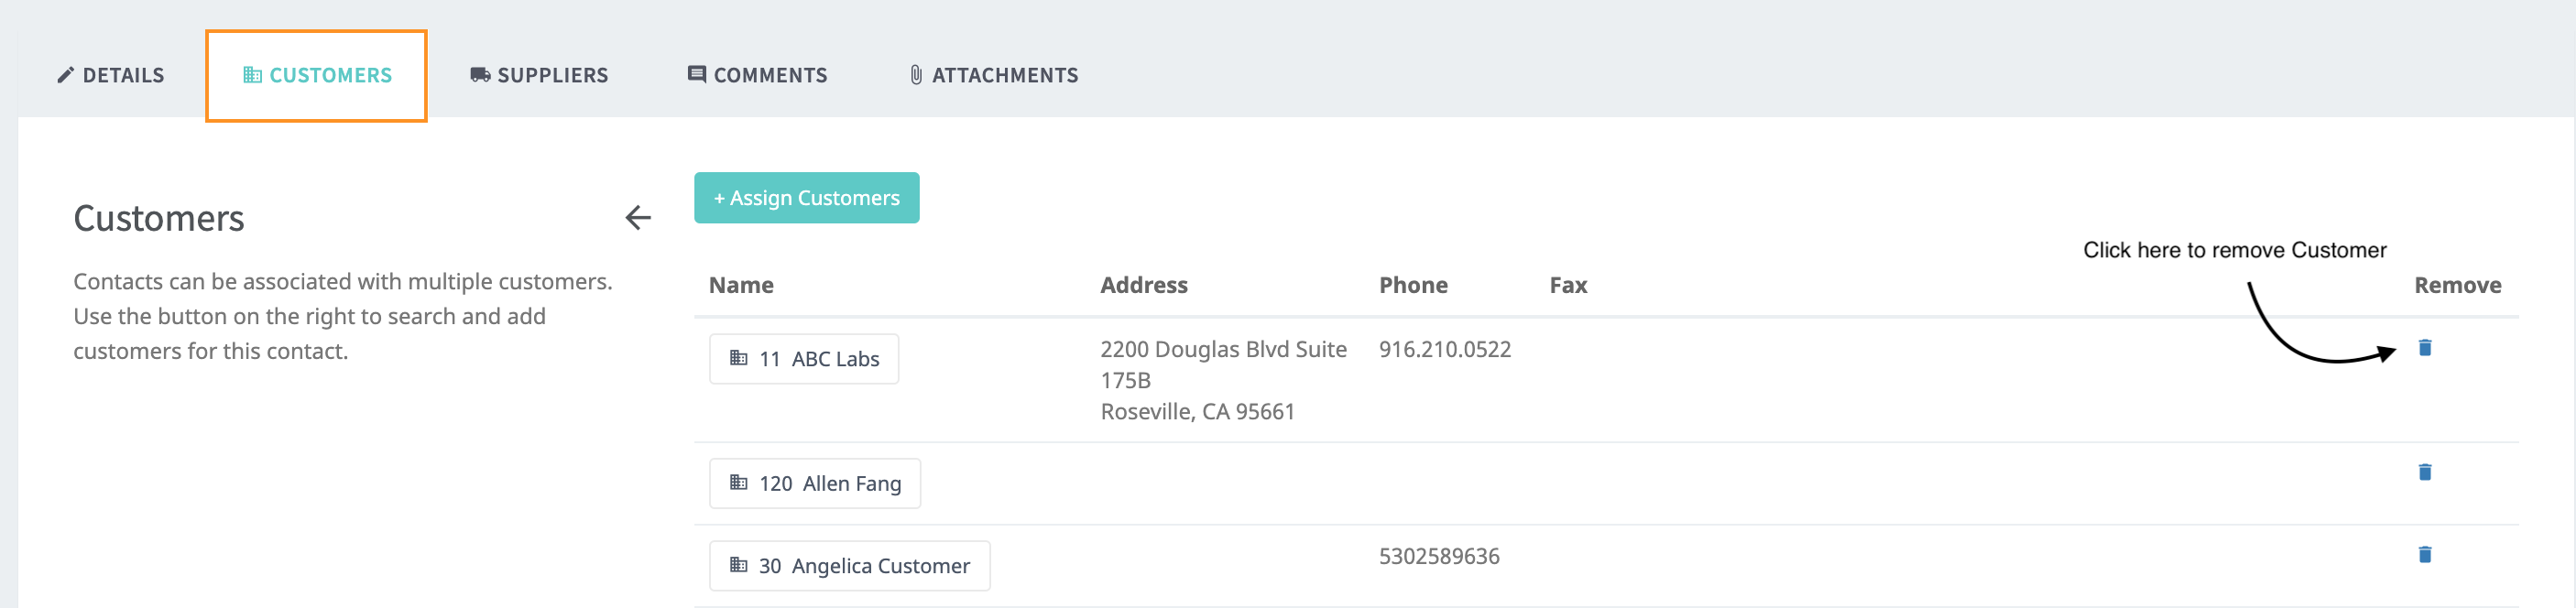
Customers
Customers are used to represent personnel for Contacts. Using the +Assign Contacts, Contacts can be assigned for the Customer.
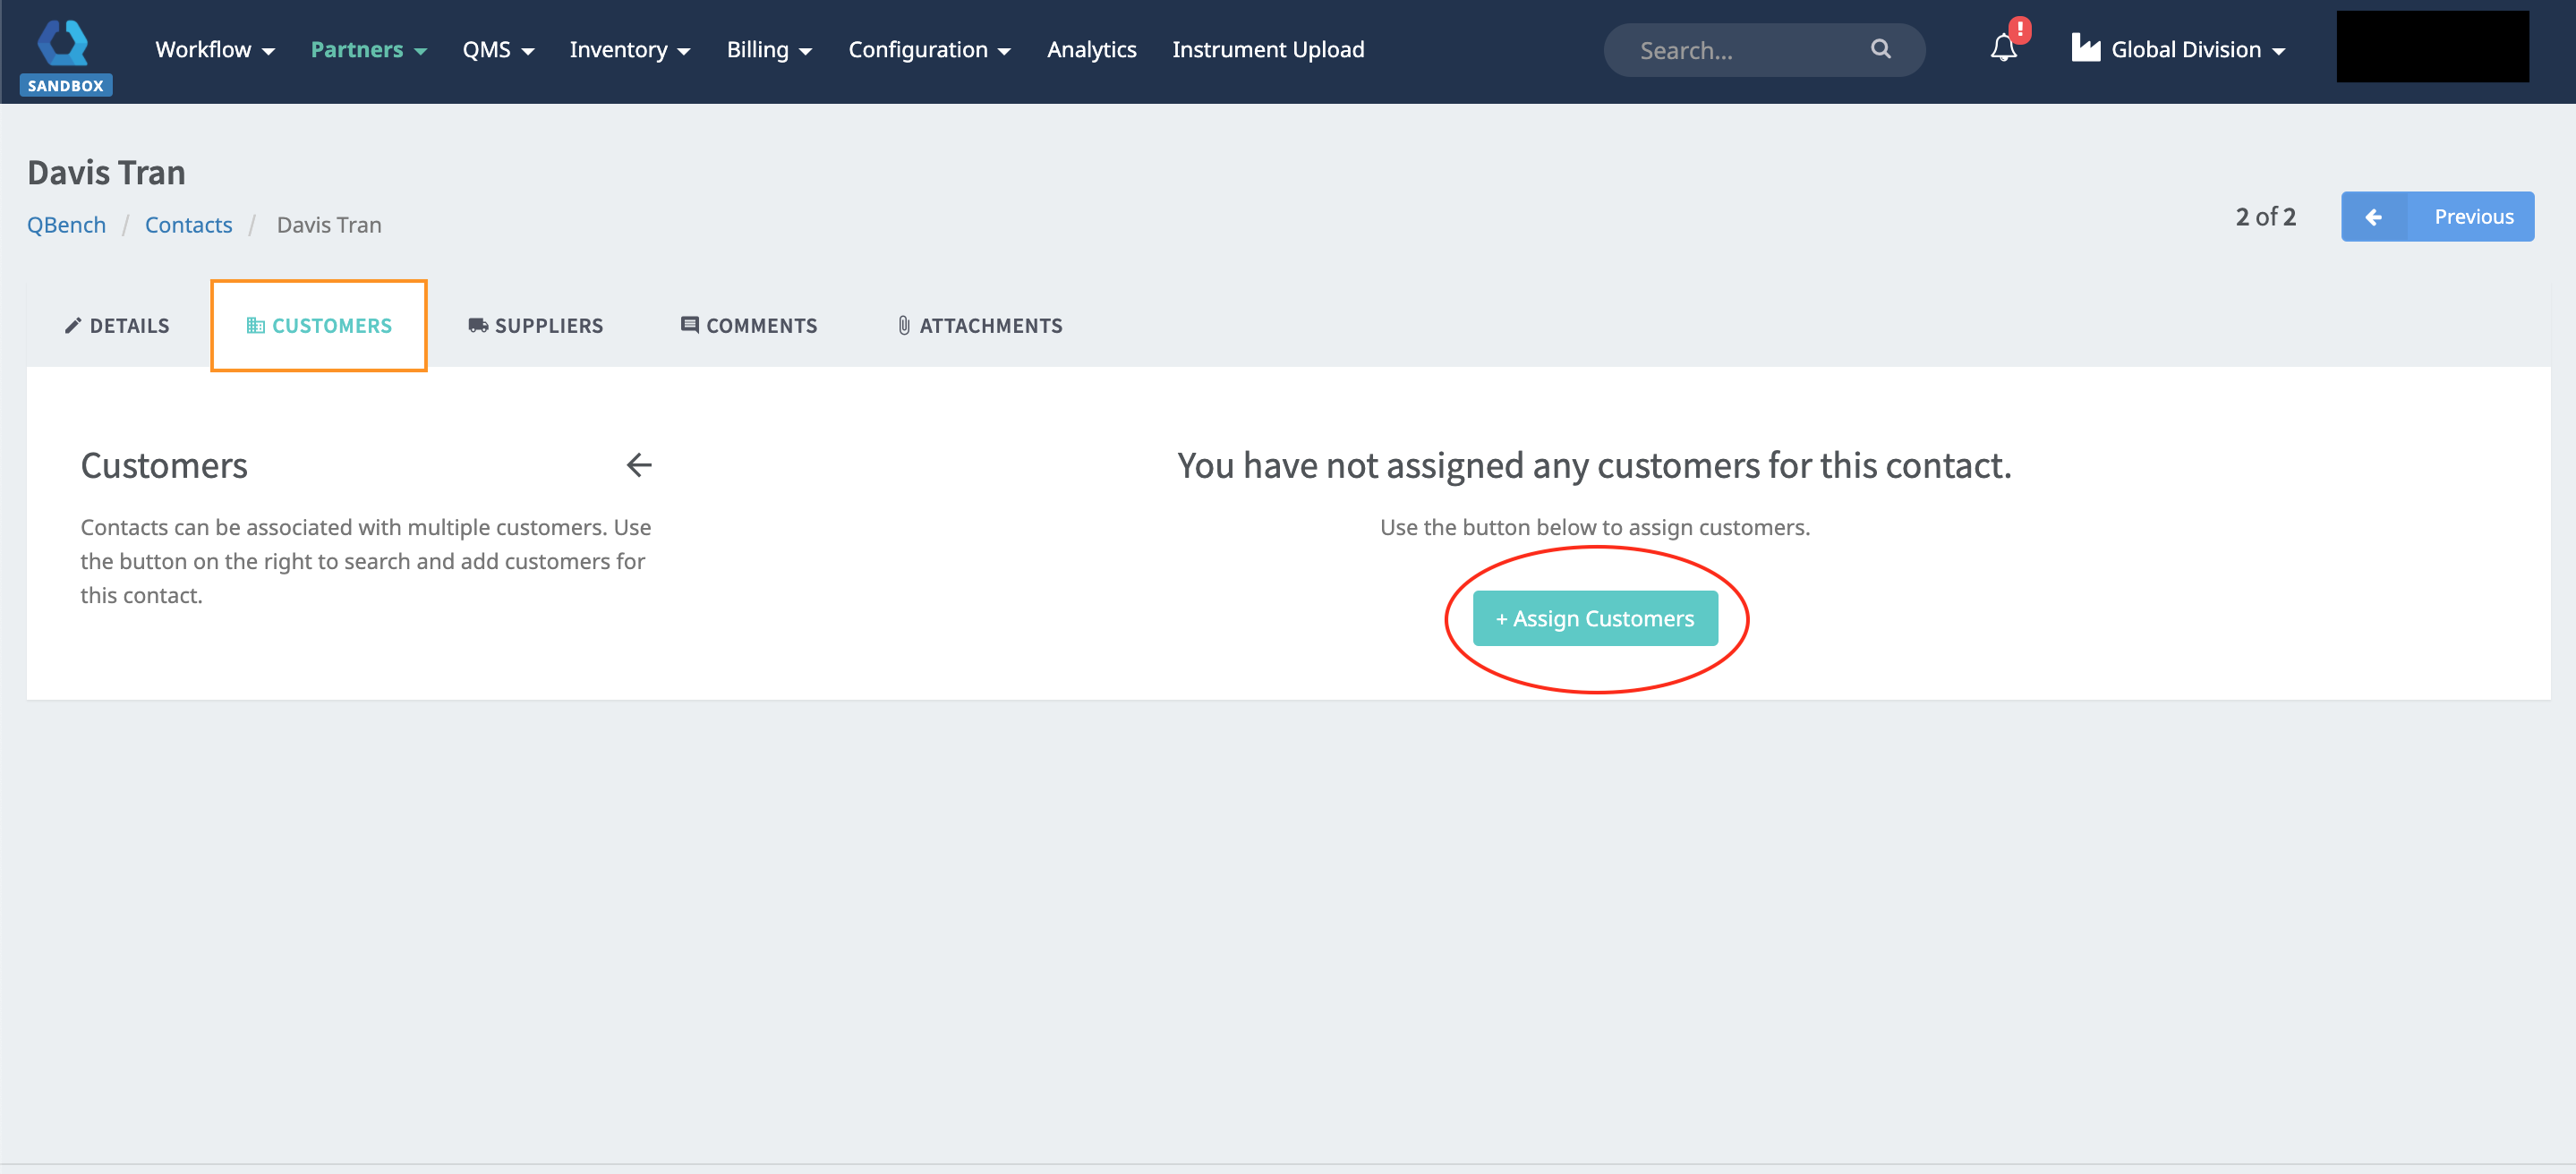
Assign the Customer for the Contact.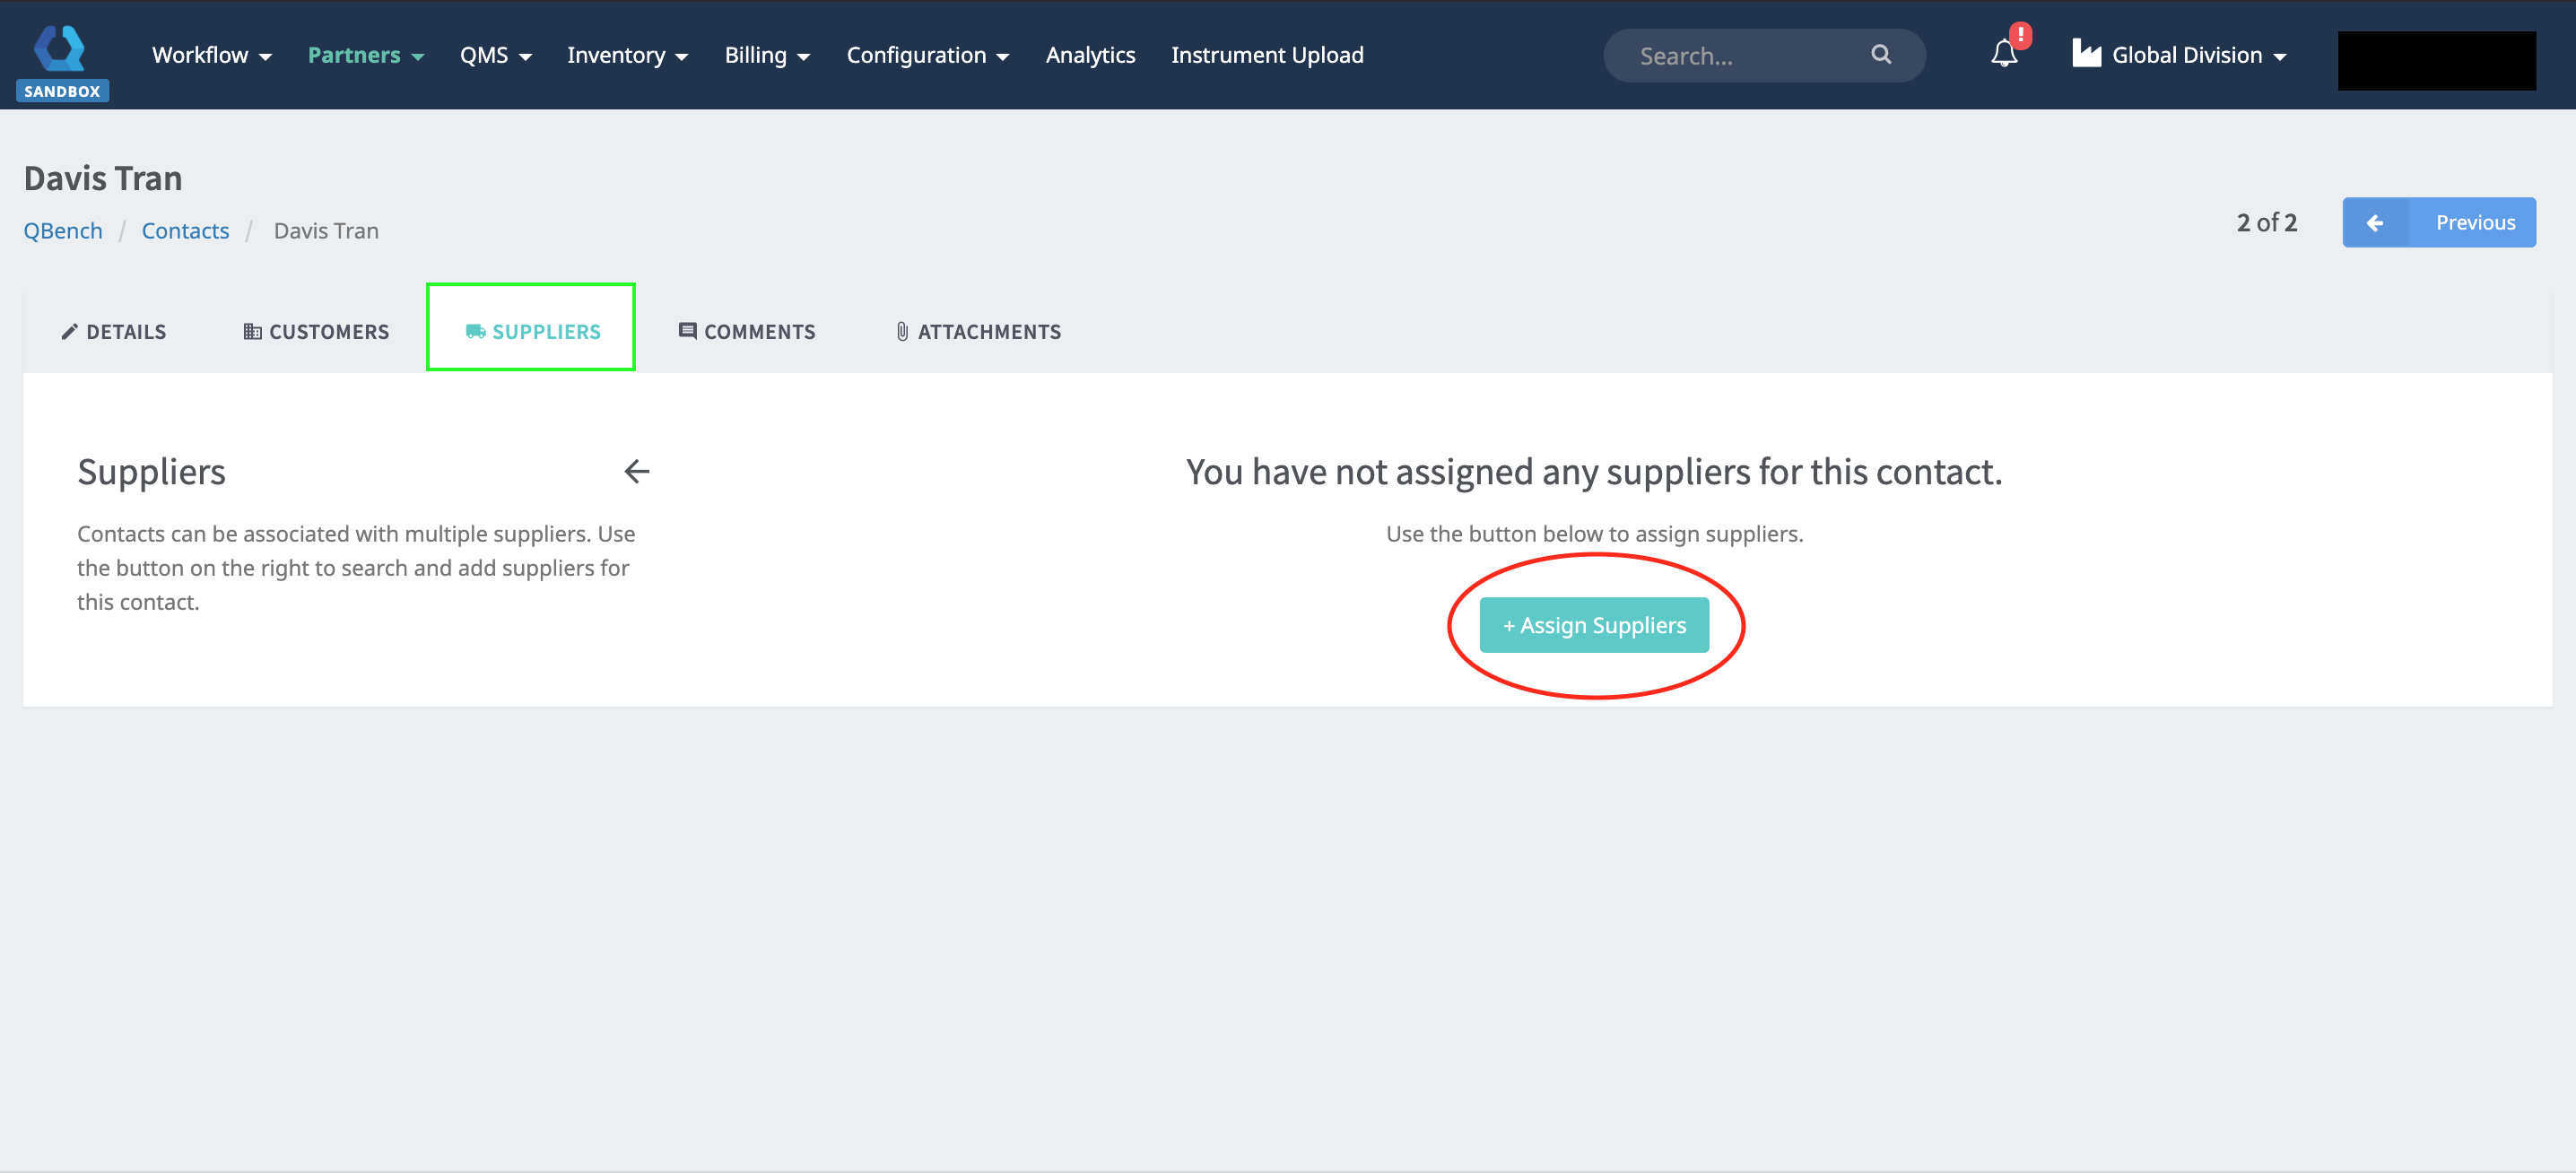
Once a Customer has been assigned, click Save. 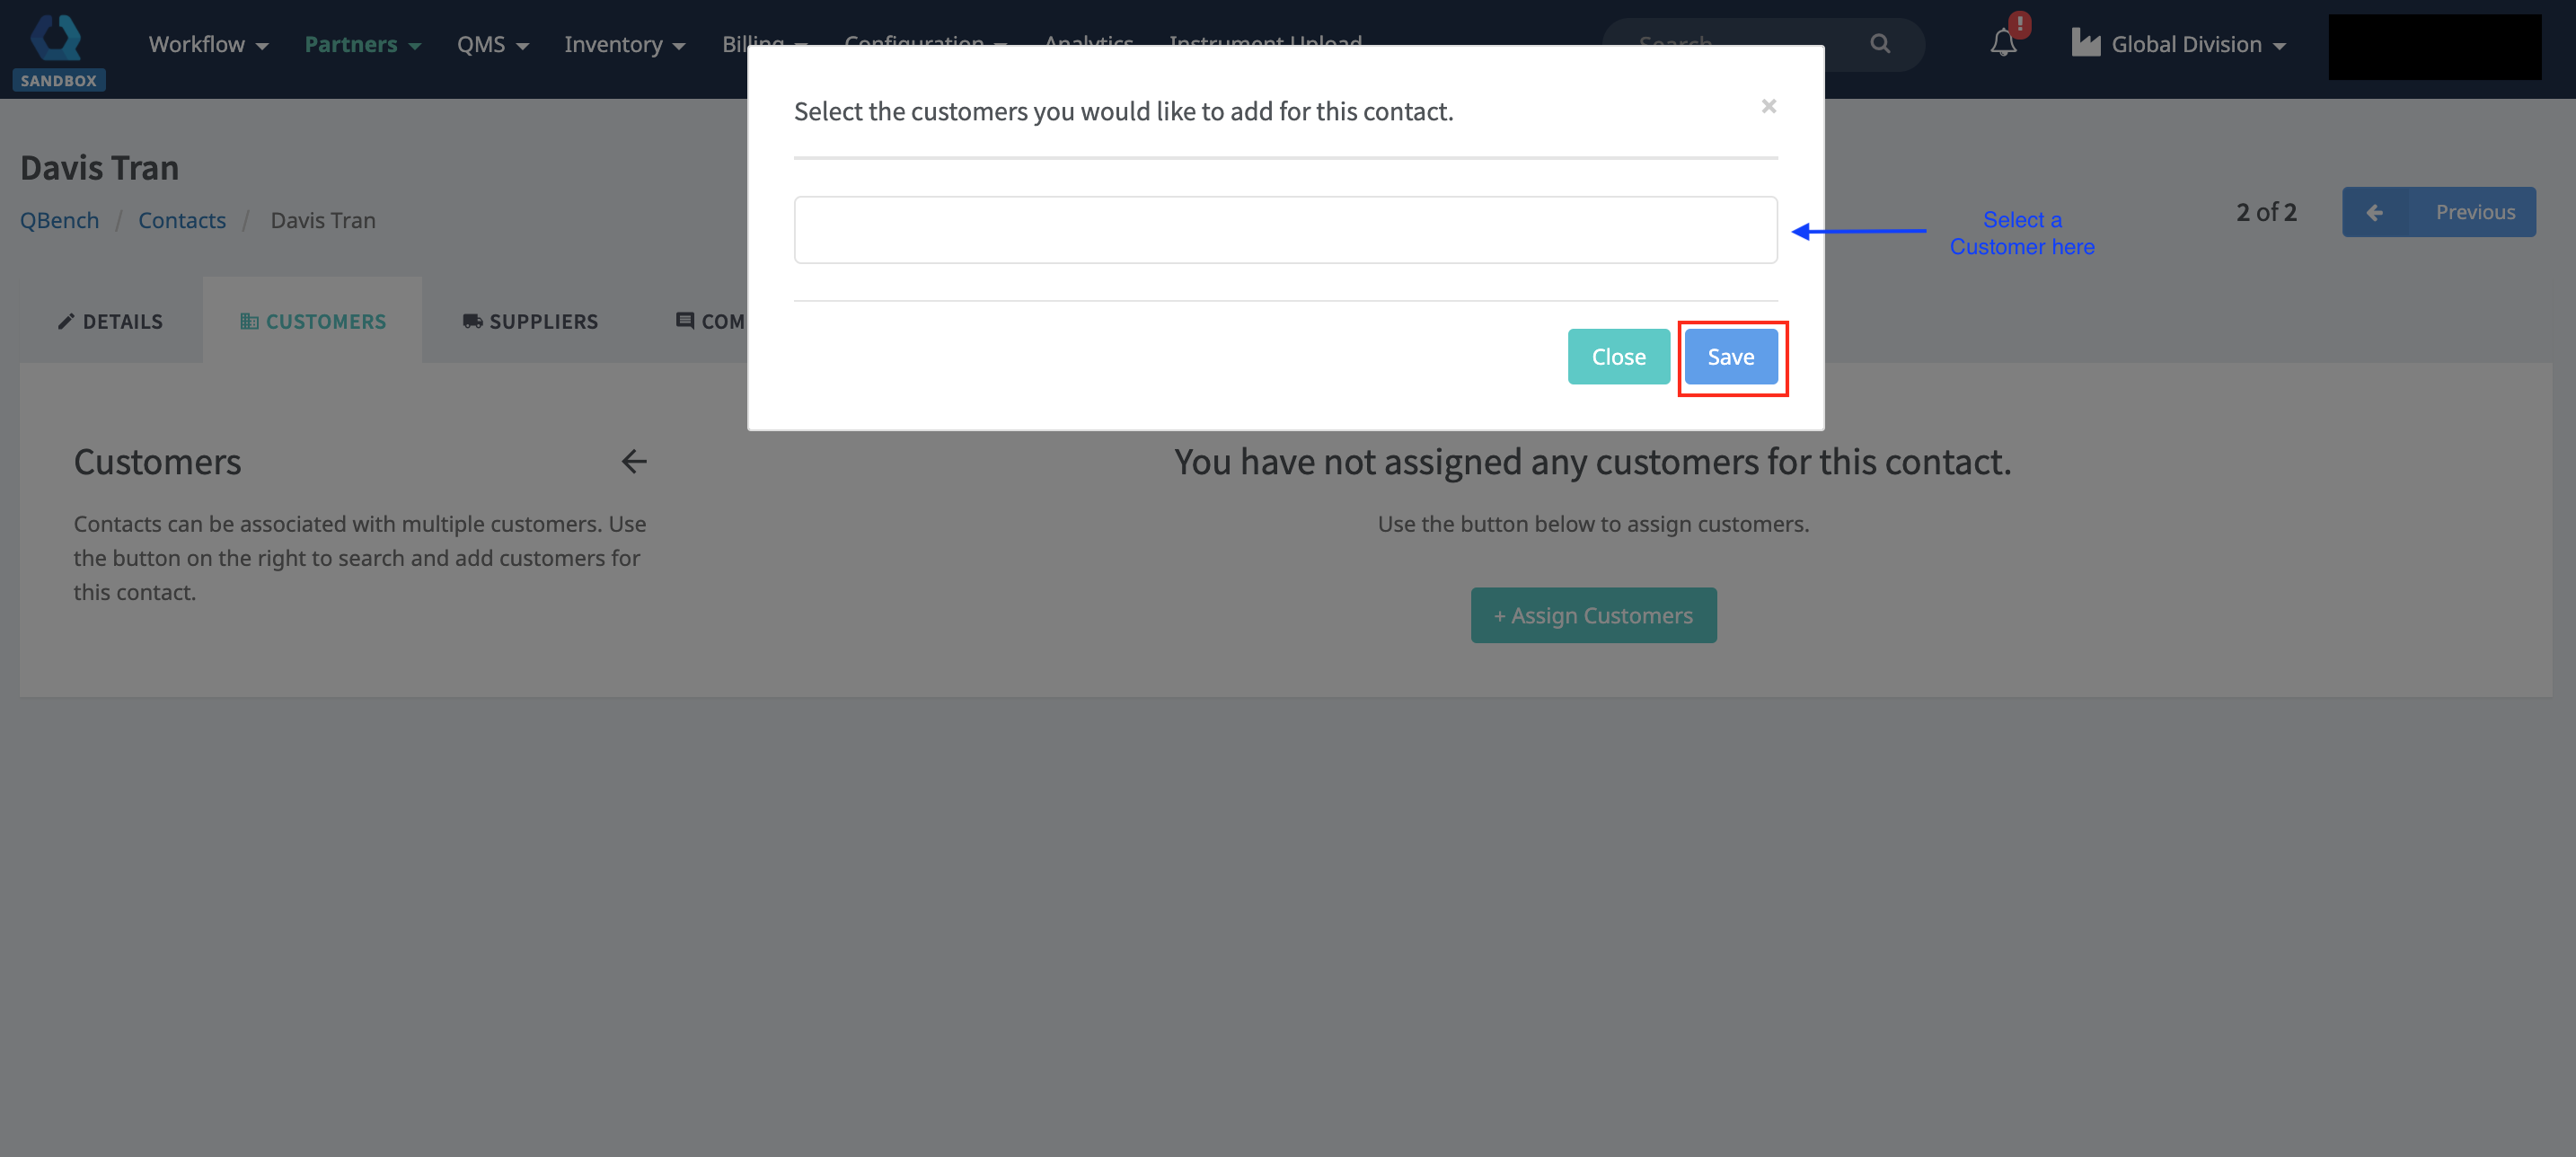
When a Customer has been assigned, it will be displayed as a list.
- Clicking on the Trash Icon will delete the Customer.
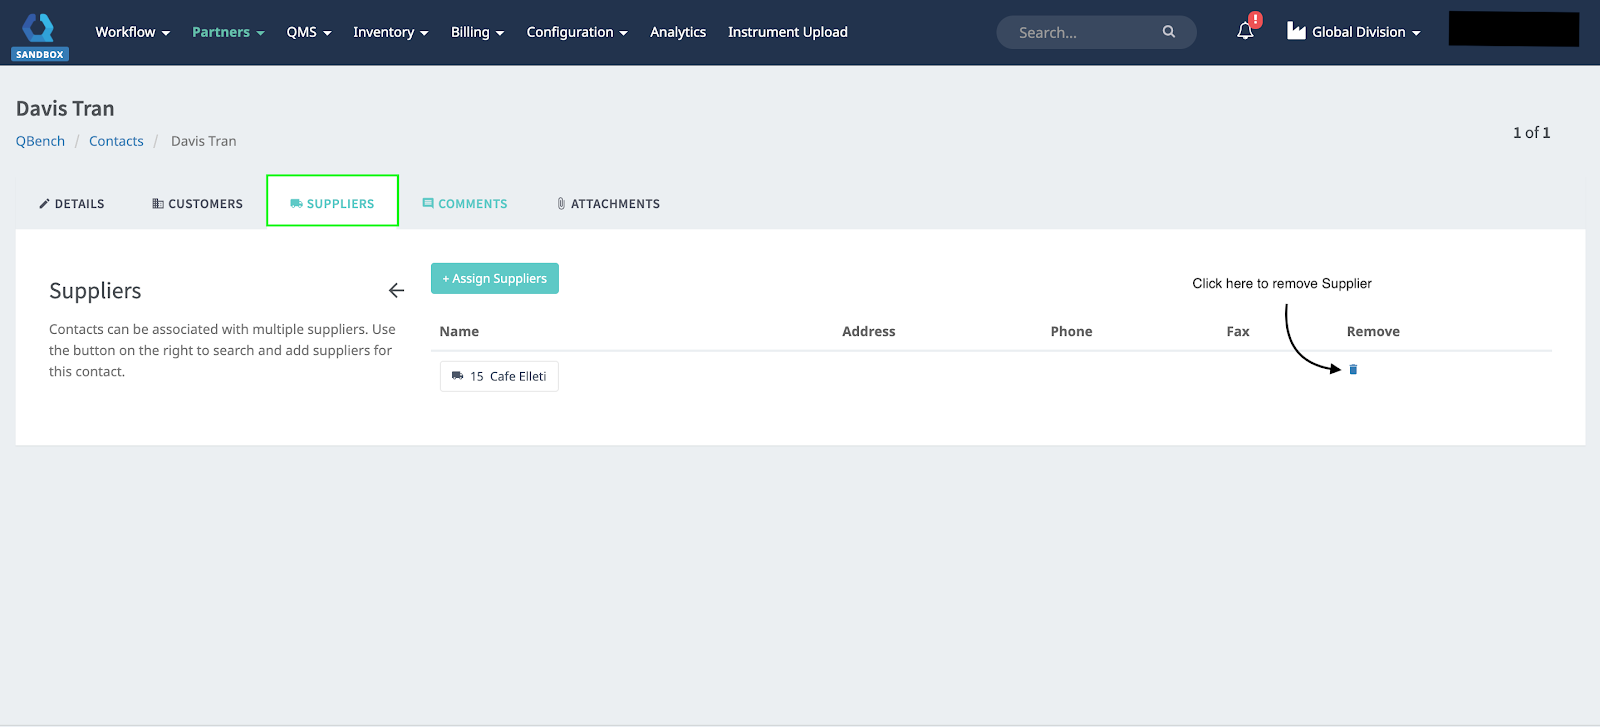
Supplier
Suppliers are used to represent personnel for Contact. Using the +Assign Contacts, Suppliers can be assigned for the Contact.
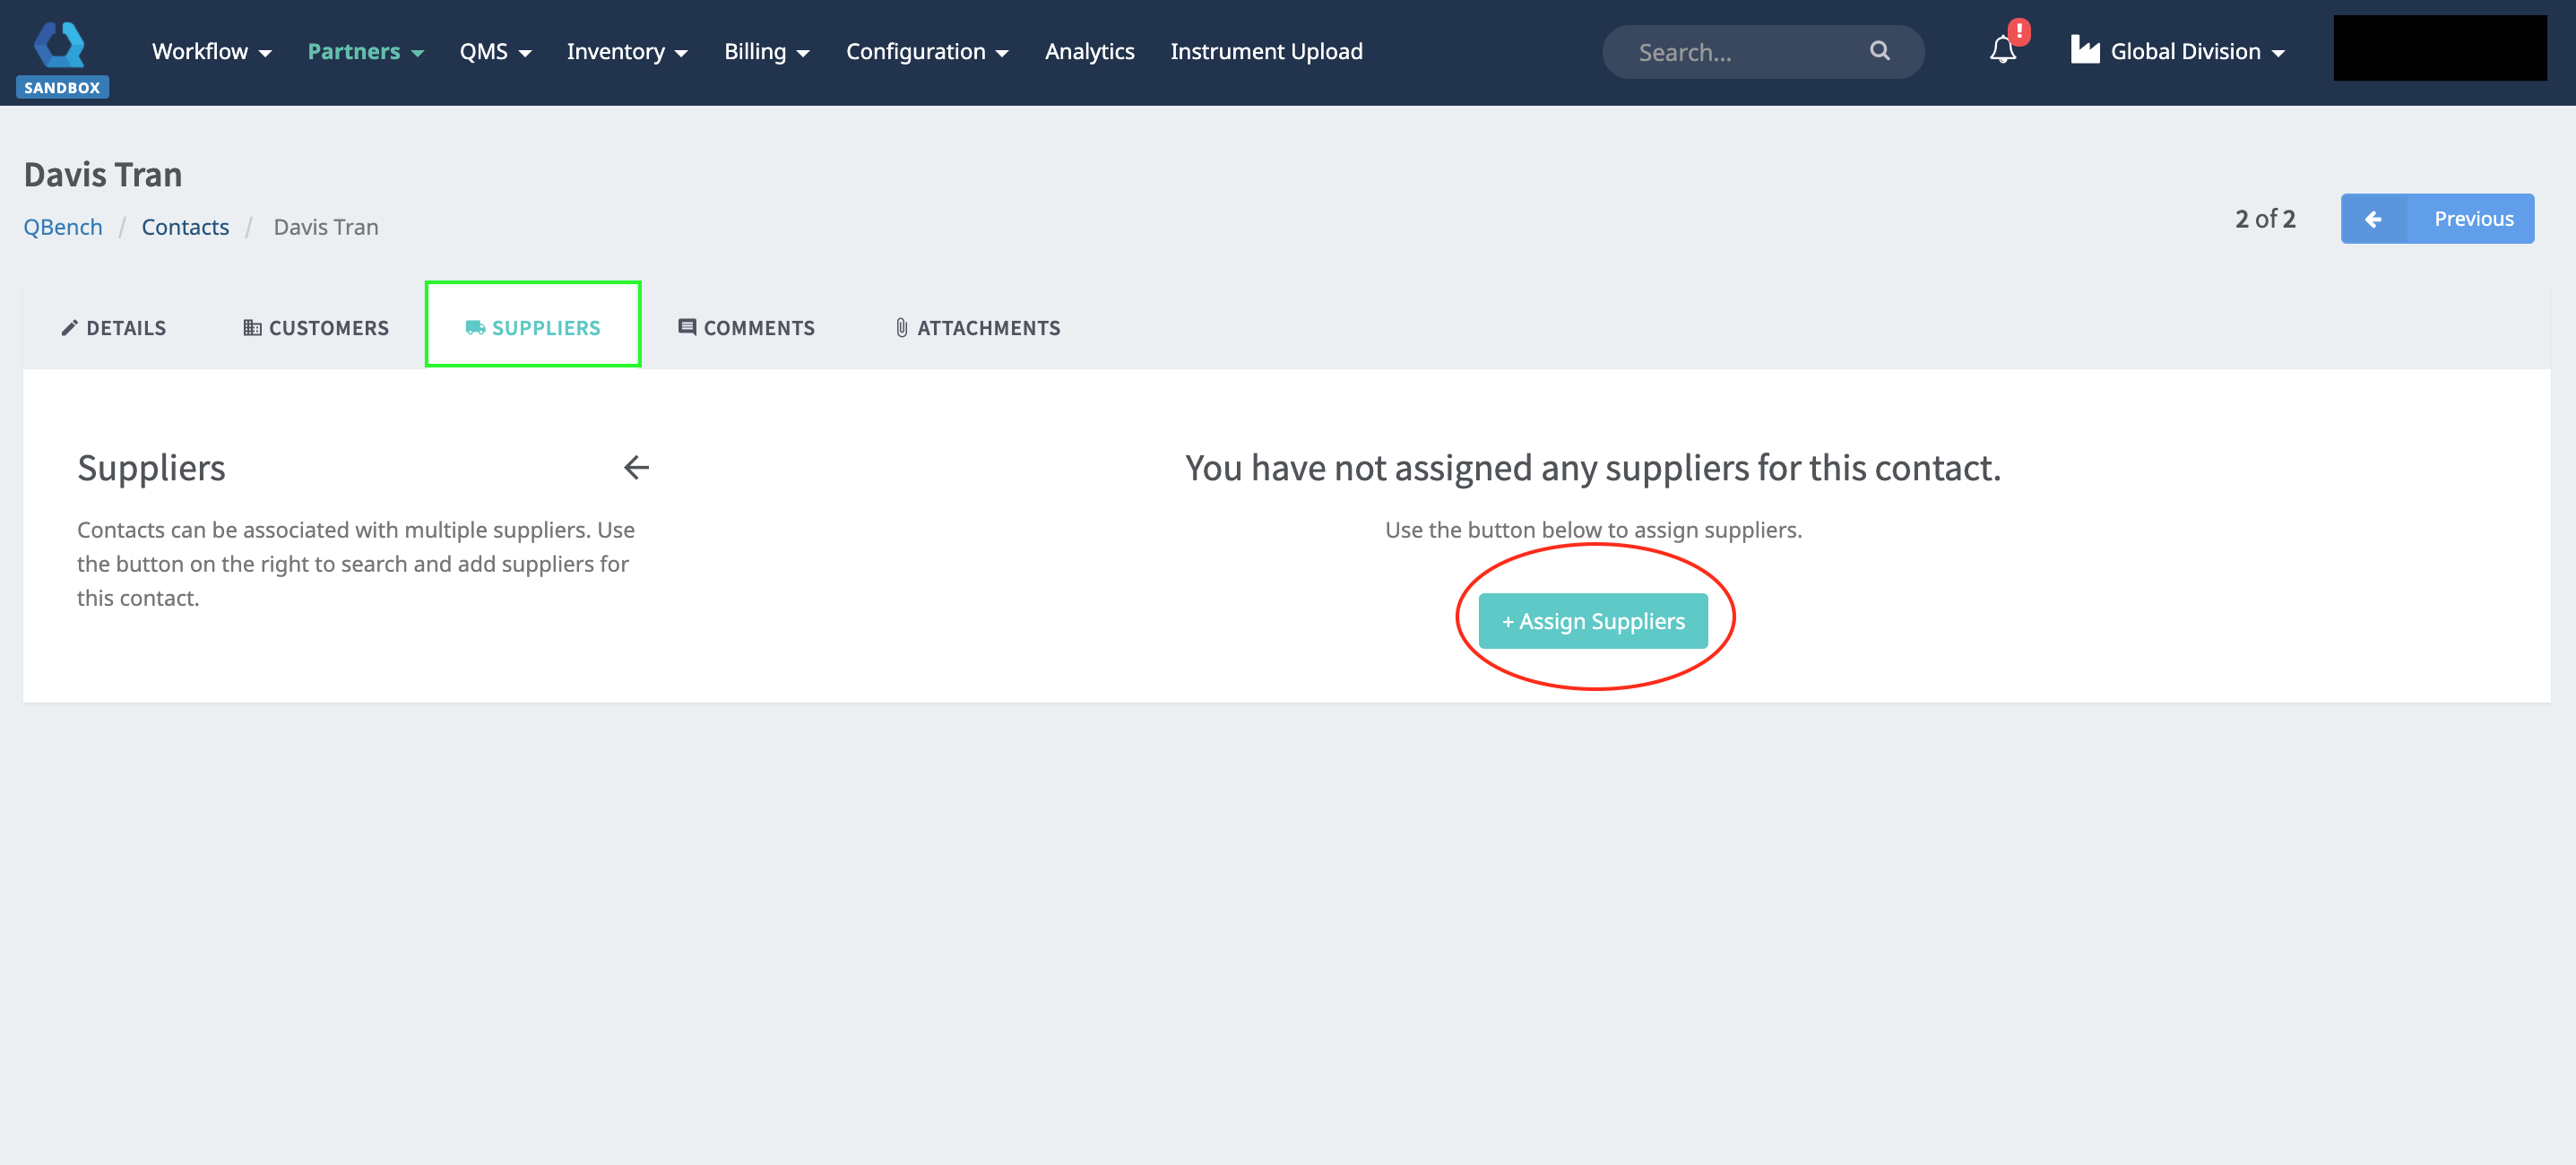
Assign the Contact for the Supplier
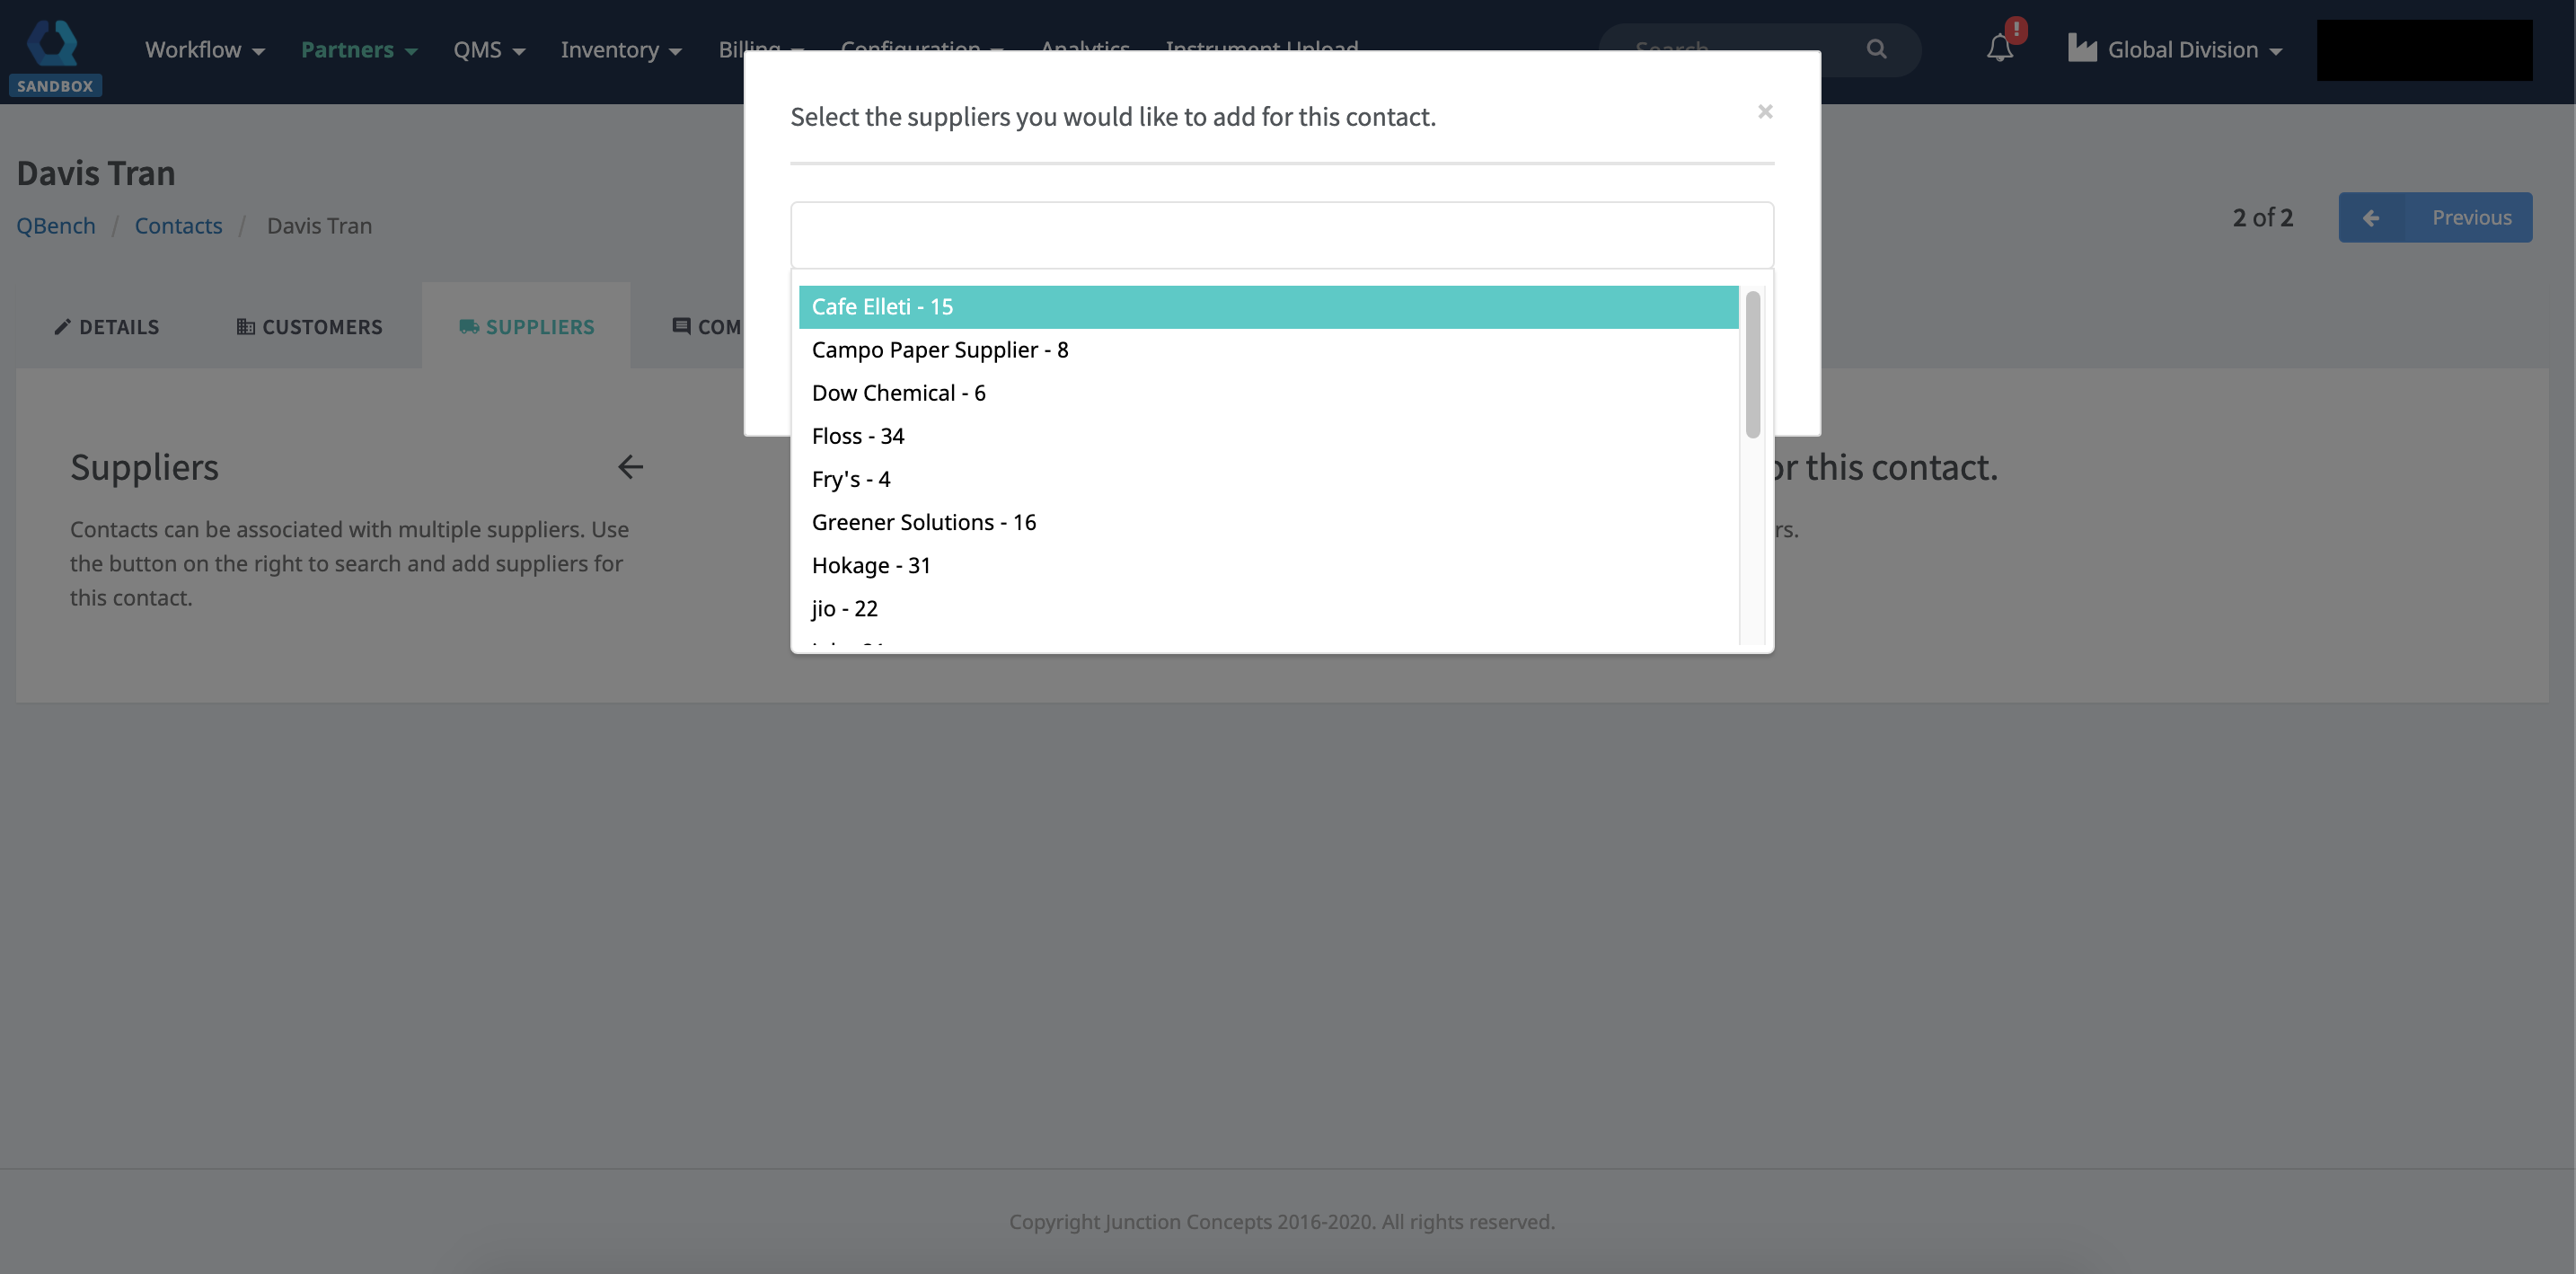
Once a Contact has been assigned, click Save.
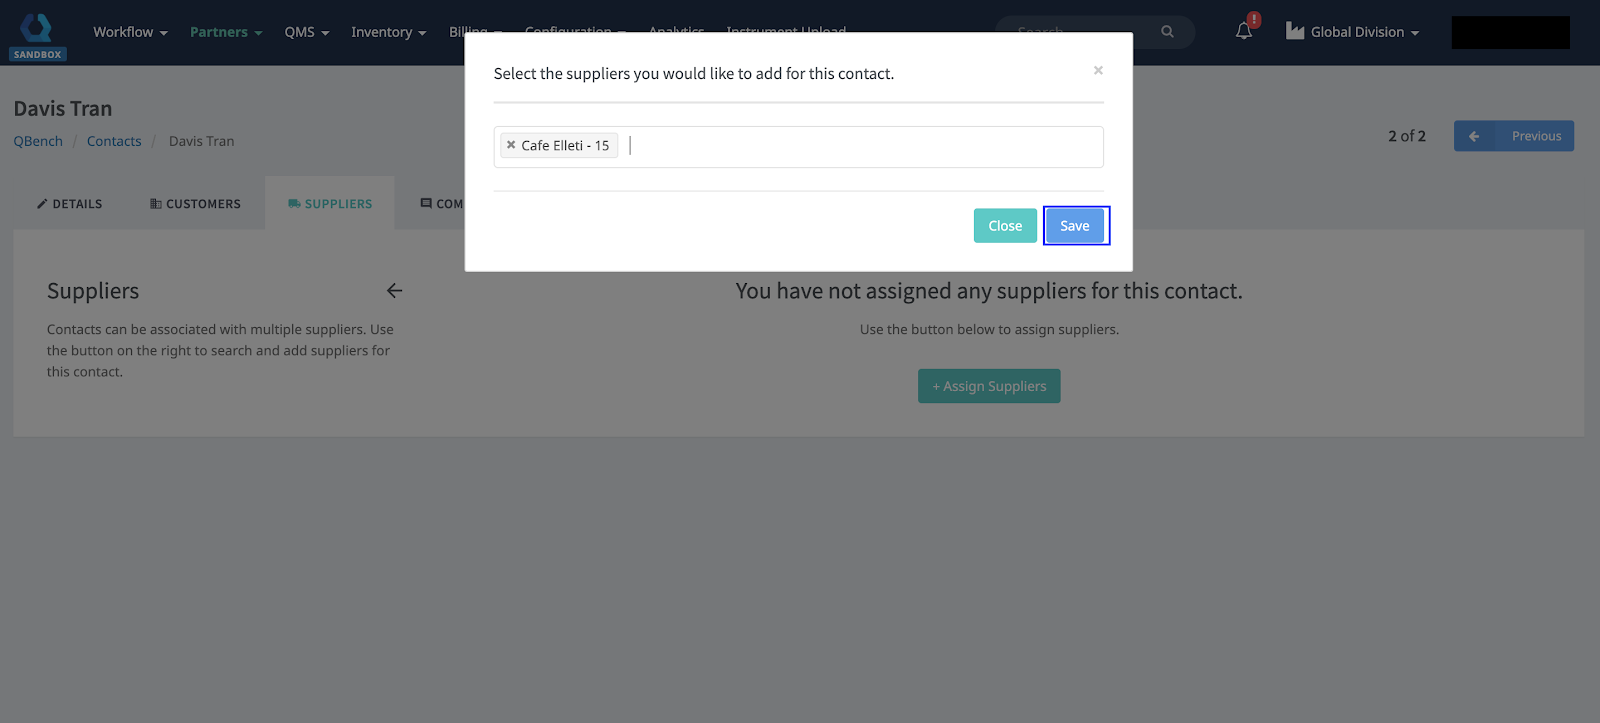
When a Supplier has been assigned, it will be displayed as a list.
- Clicking on the Trash Icon will delete the Supplier.
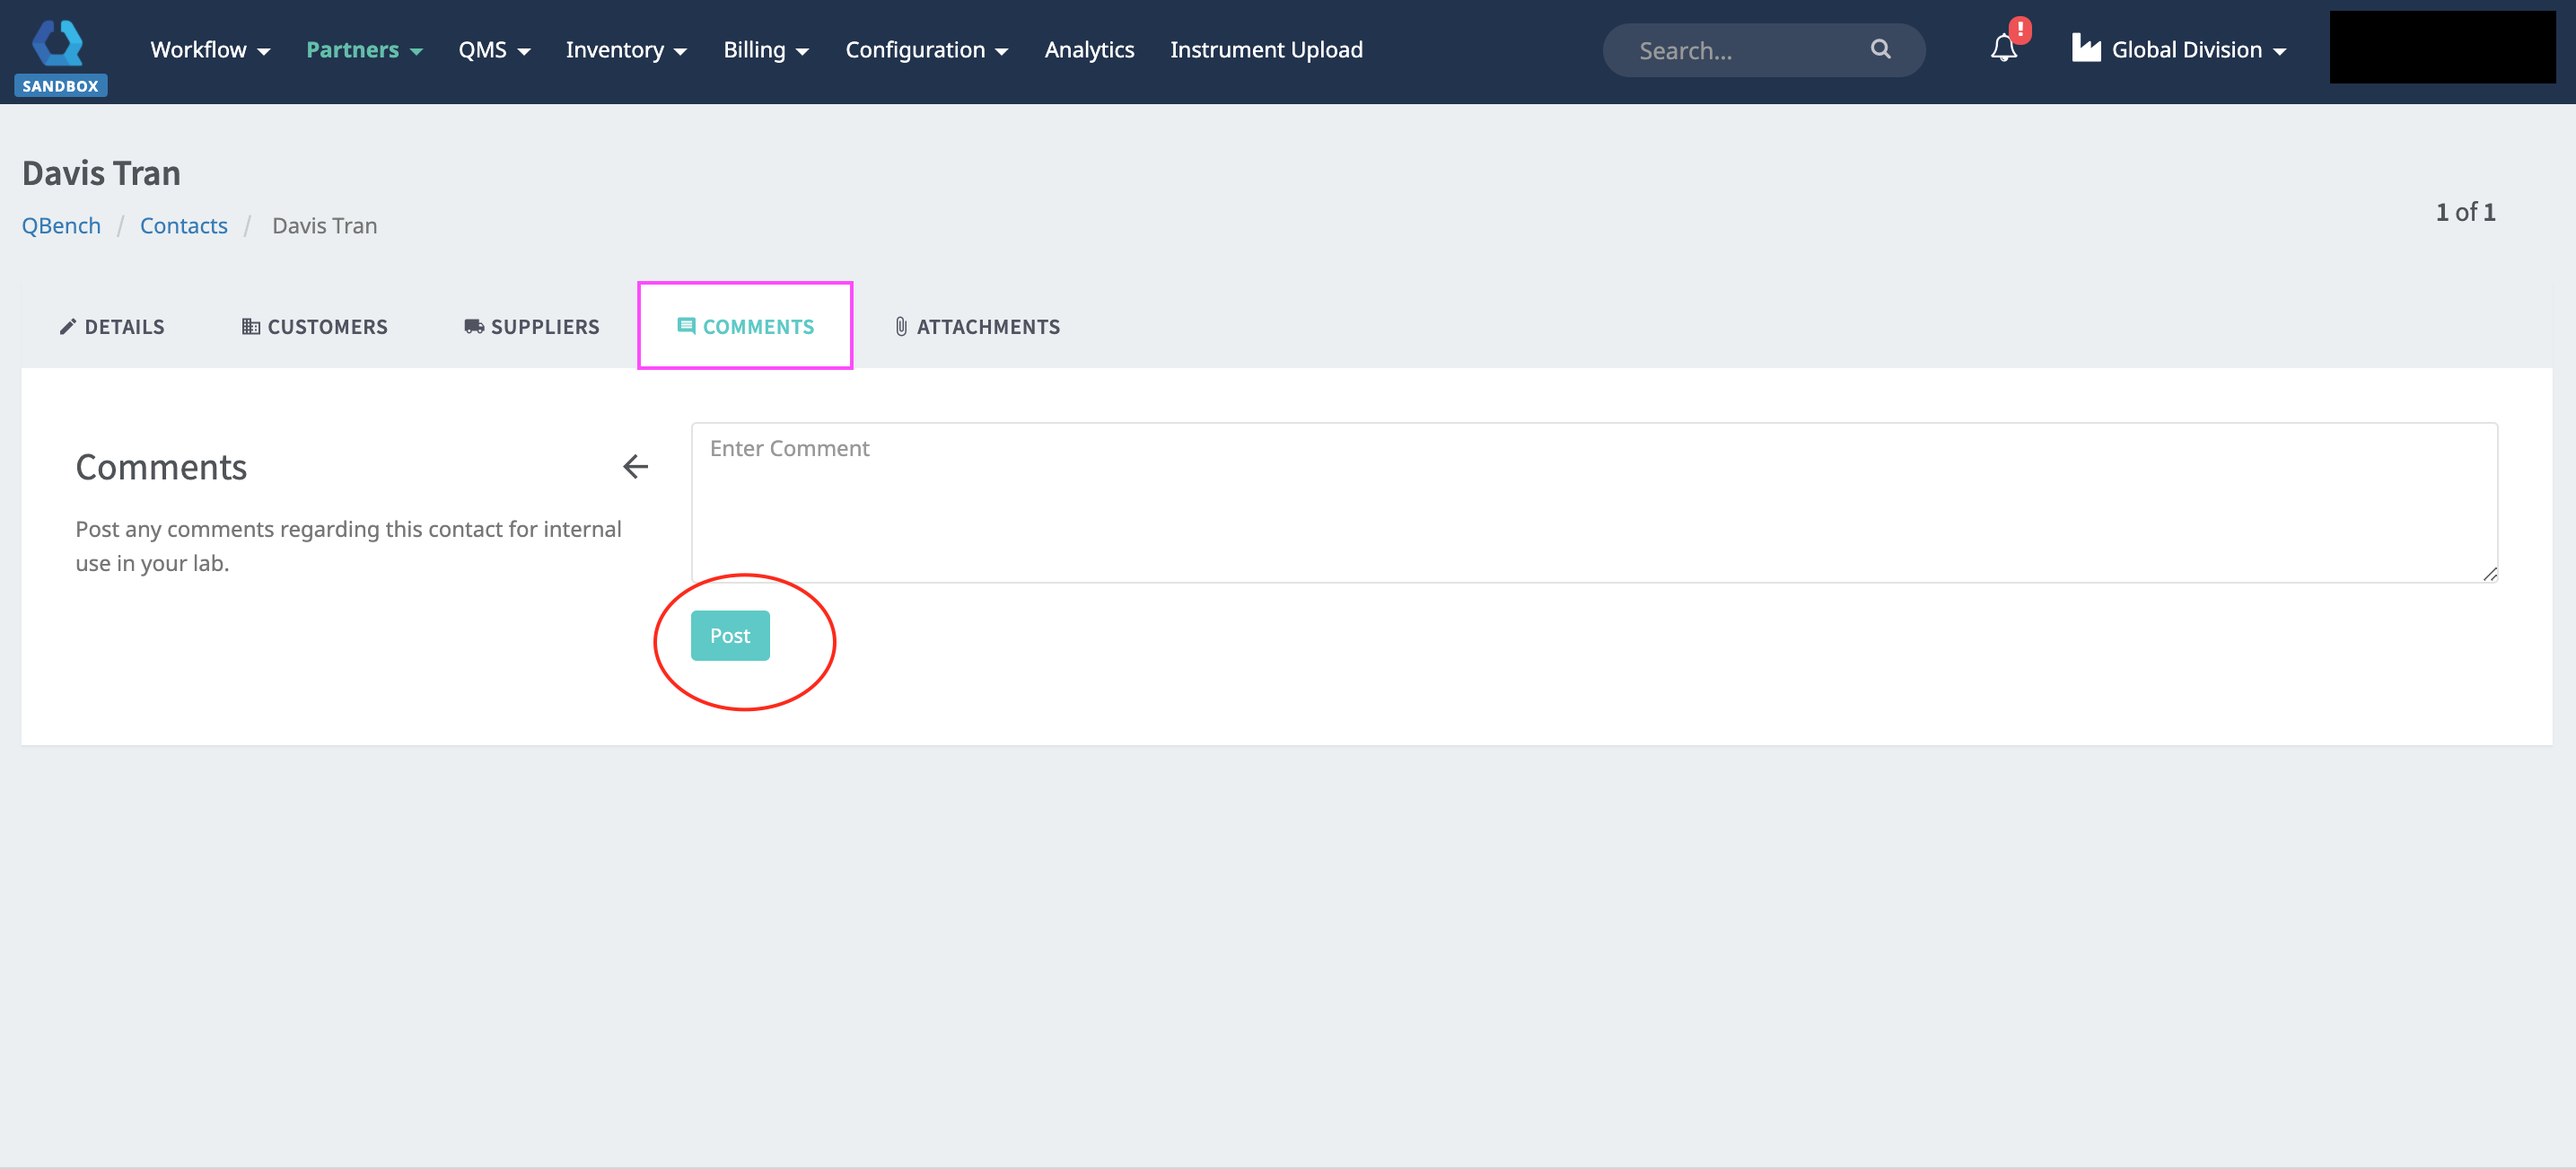
Comments
Enter Comments into the blank field and click Post.
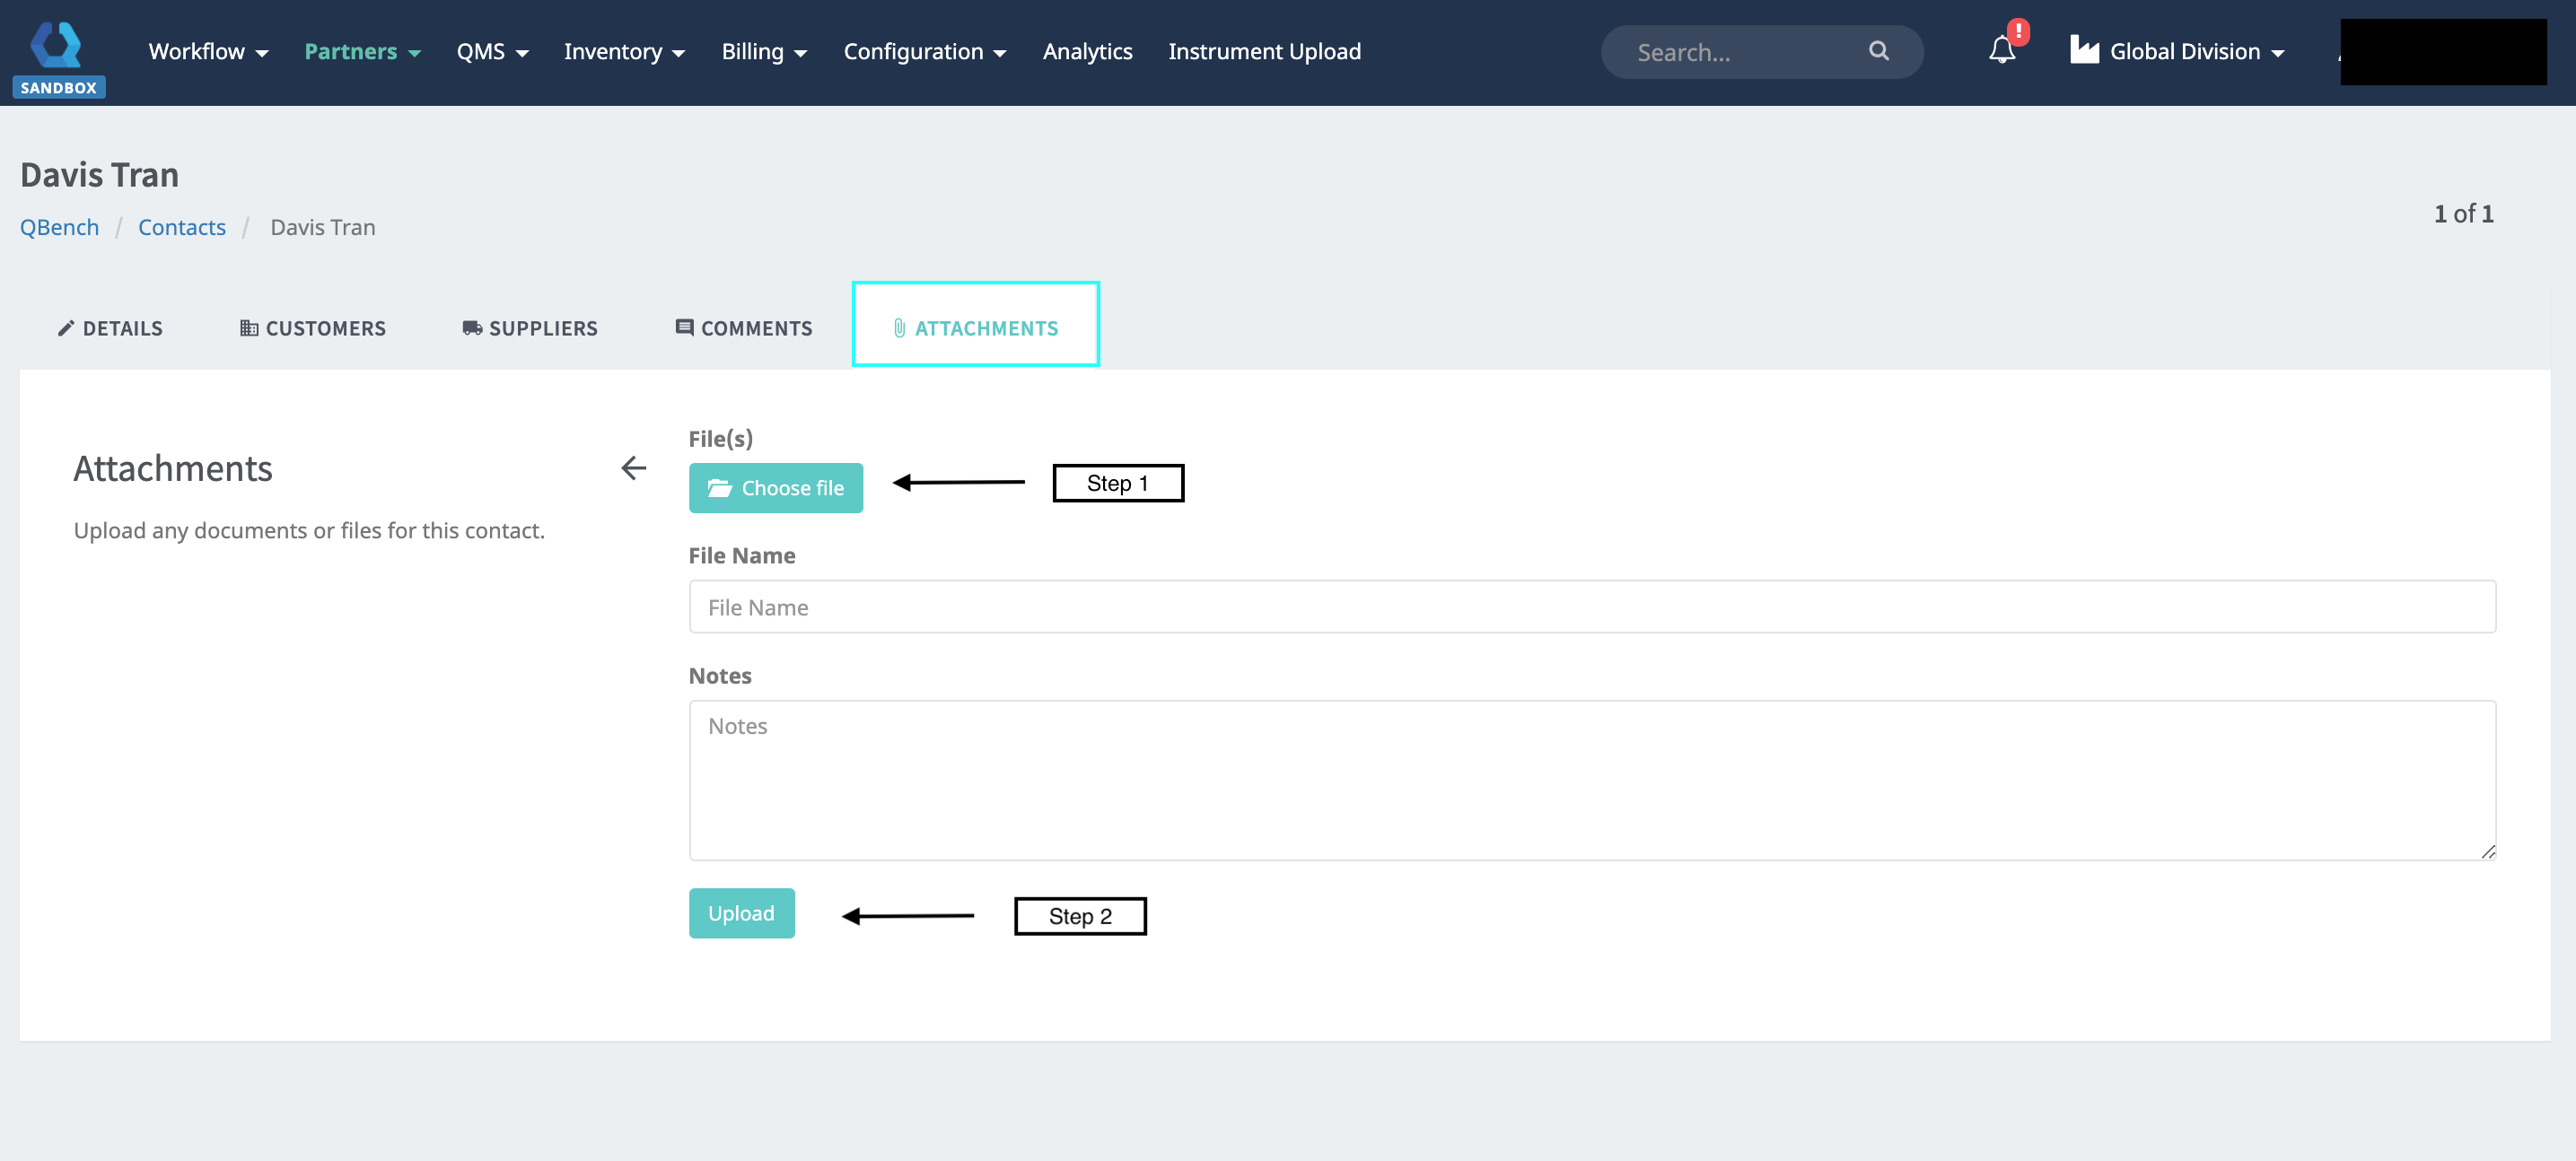
Attachments
-
- To attach file(s), click on Choose Files.
- Once the file(s) is selected, click on Upload.
Below shows the Uploaded File and the different options to manage the files (Download File and Remove File). 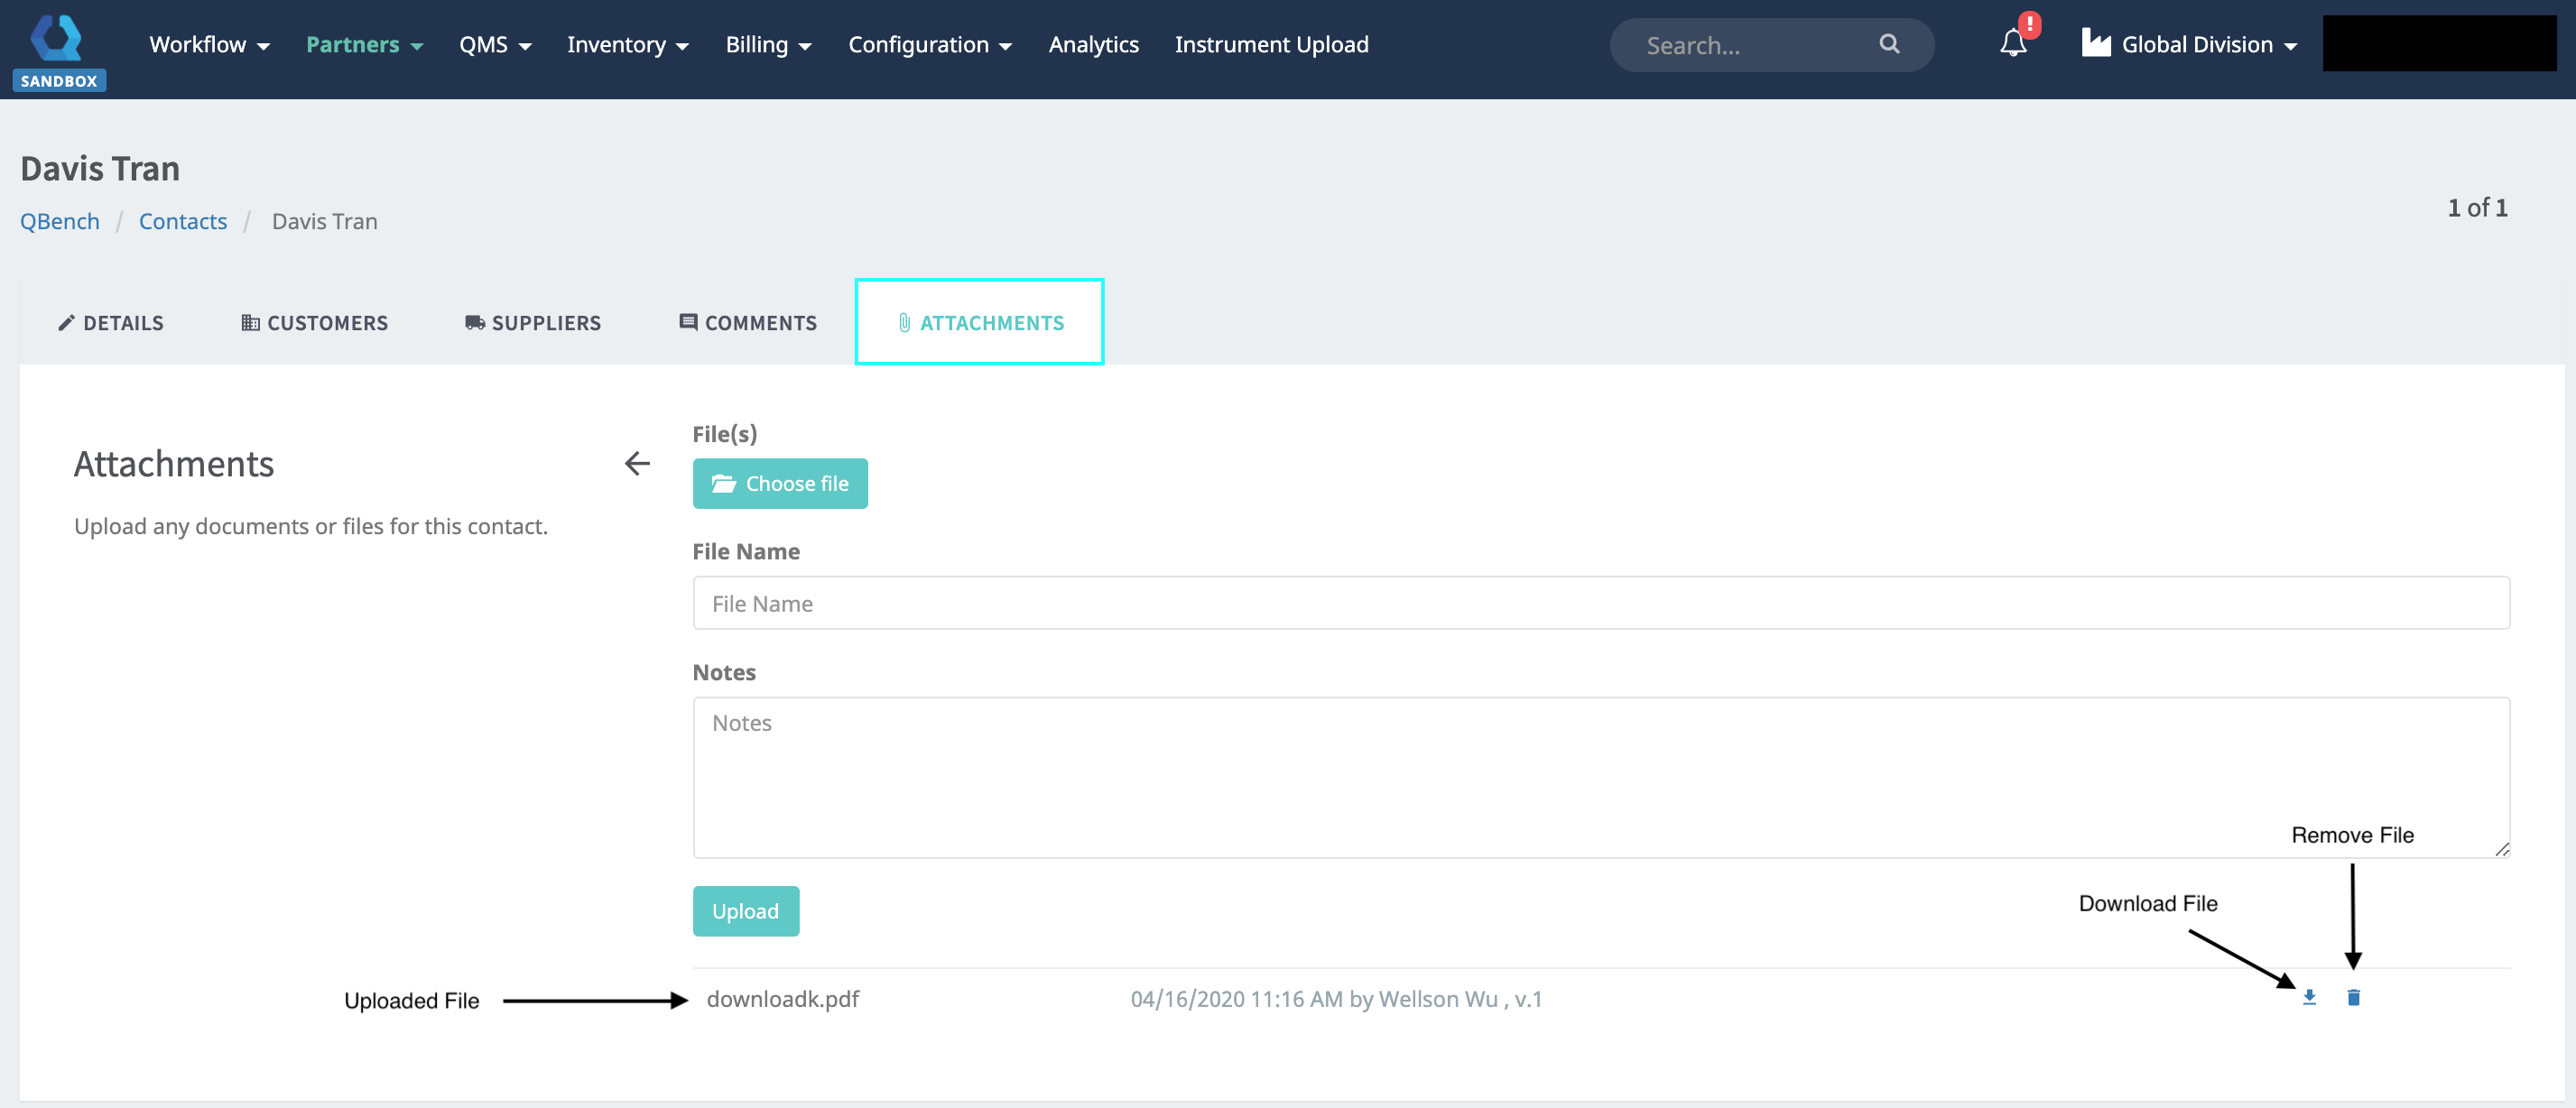
Comments
0 comments
Article is closed for comments.