Overview:
Auto create contact allows the LIMS users to create Customer Portal Users automatically without having to enter information manually as long as the Customer Portal Users’ information is configured in your SAML provider. The current setup is when a new Customer Portal User is logging into the portal, a customer and a contact is automatically set up using the user information stored in Okta or Onelogin and the new user then successfully logs into the customer portal page.
Prerequisite:
1. Enable SAML login and finish setting up SAML configuration (instructions here)
2. Enable Auto Create Contact
Steps:
1. Onelogin:
Admin should create SAML Fields in the parameters tab
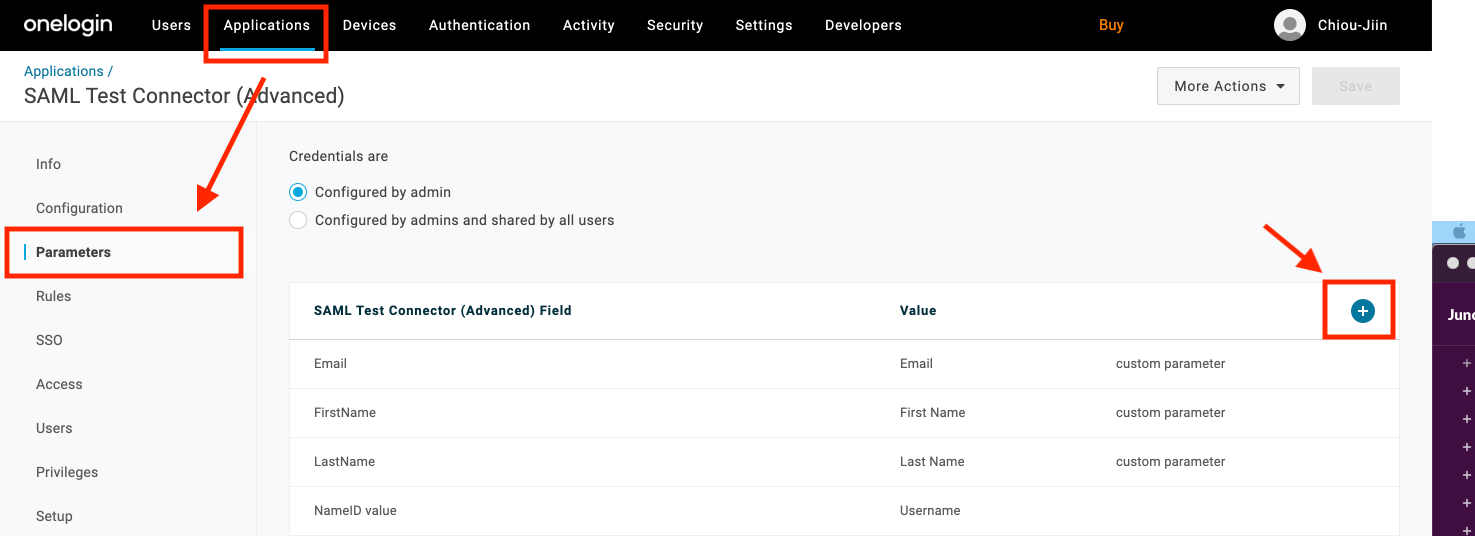
Be sure to click on Include in SAML assertion in order to access it in QBench.
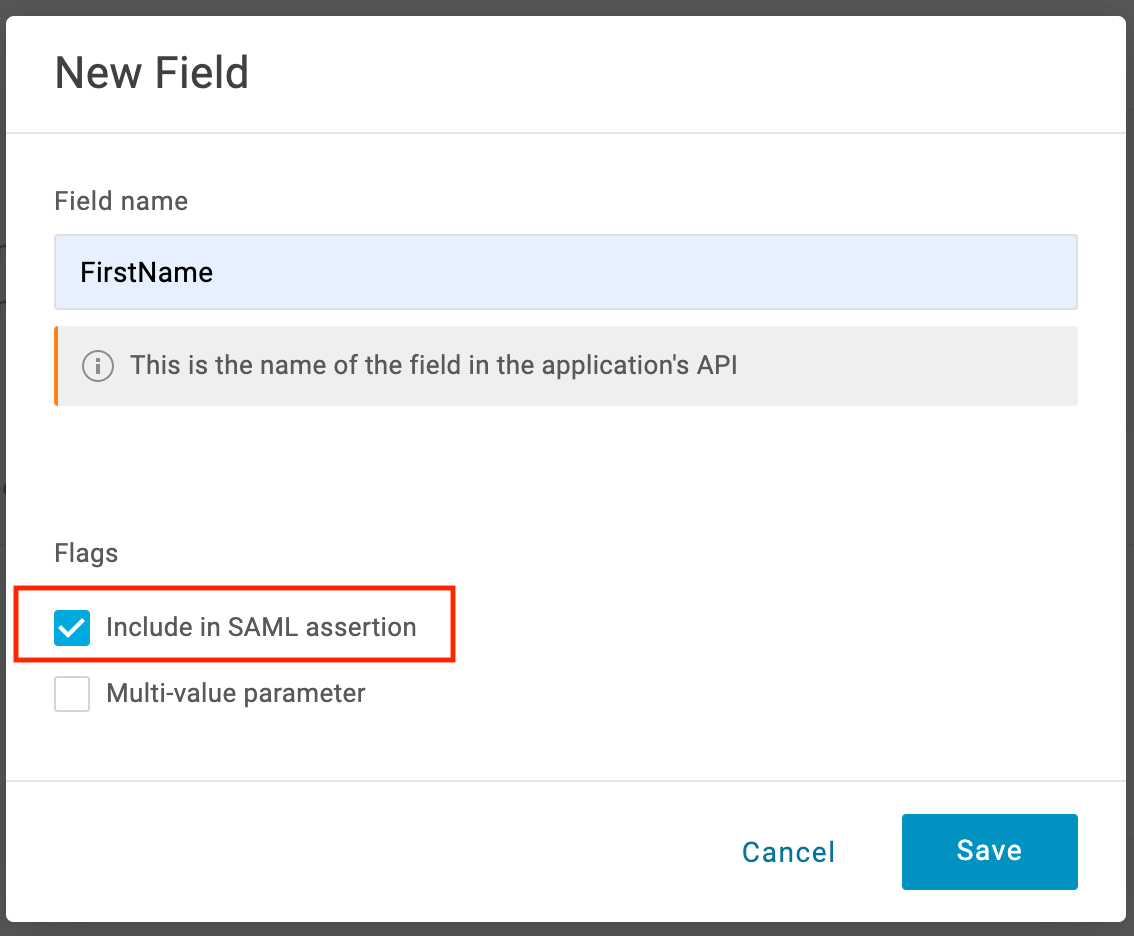
Important Note: Please create an Email field, it is required for creating Customer and Contact in QBench and should always be present.
2. Fill in the additional fields for each user

Okta:
- In the Directory tab, click on Profile Editor in order to add additional fields that are needed in QBench. Click on the Profile button next to the QBench application, then click on add attribute to add the additional fields
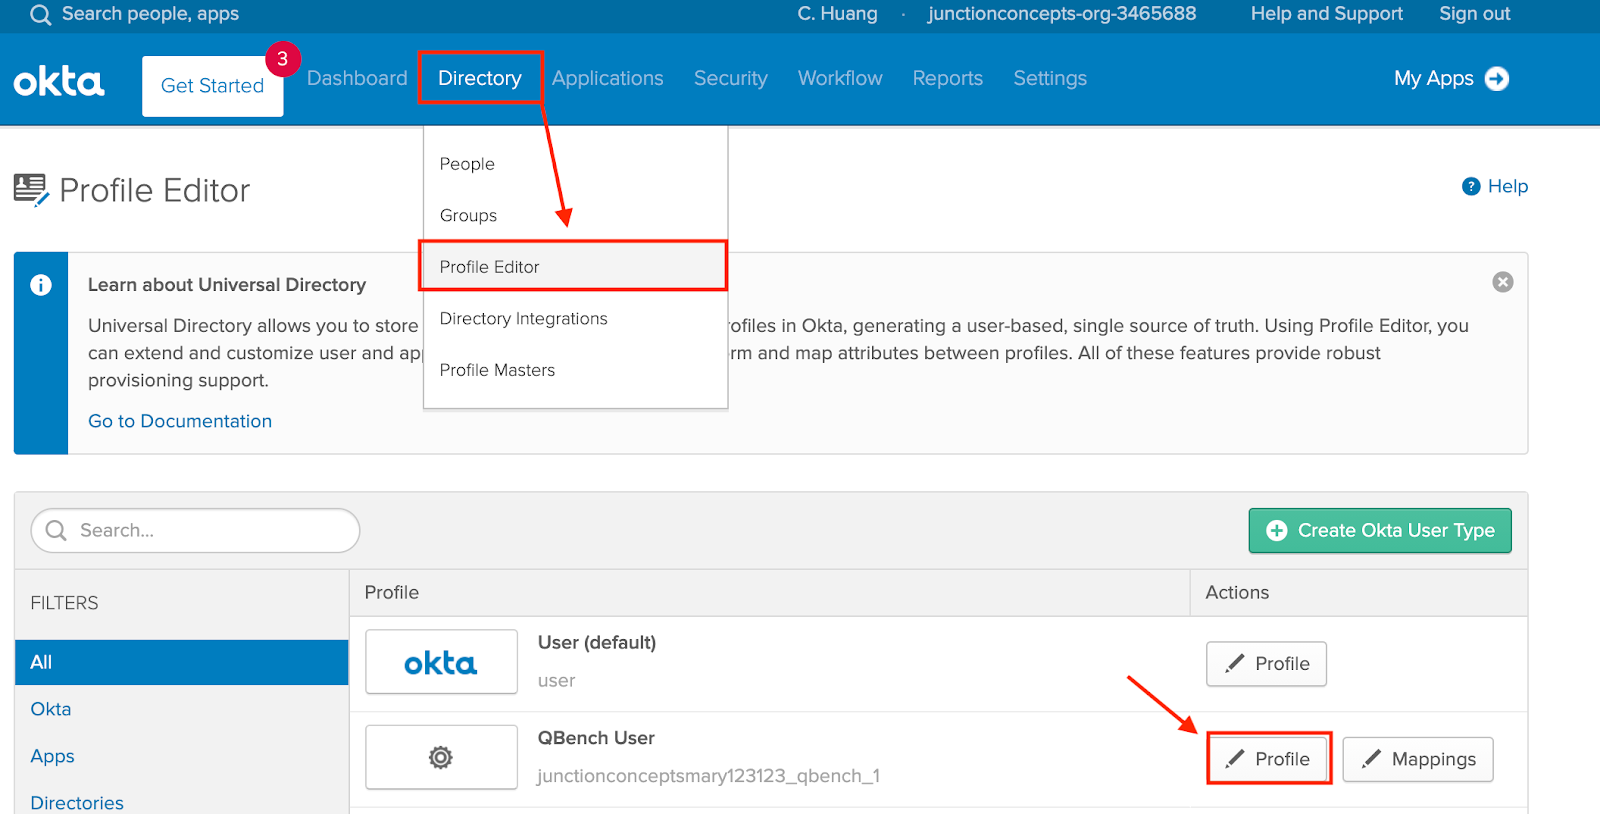

2. Admins should then head to the QBench application

Under General Settings

Click on the Edit button on the right of the SAML Settings header.
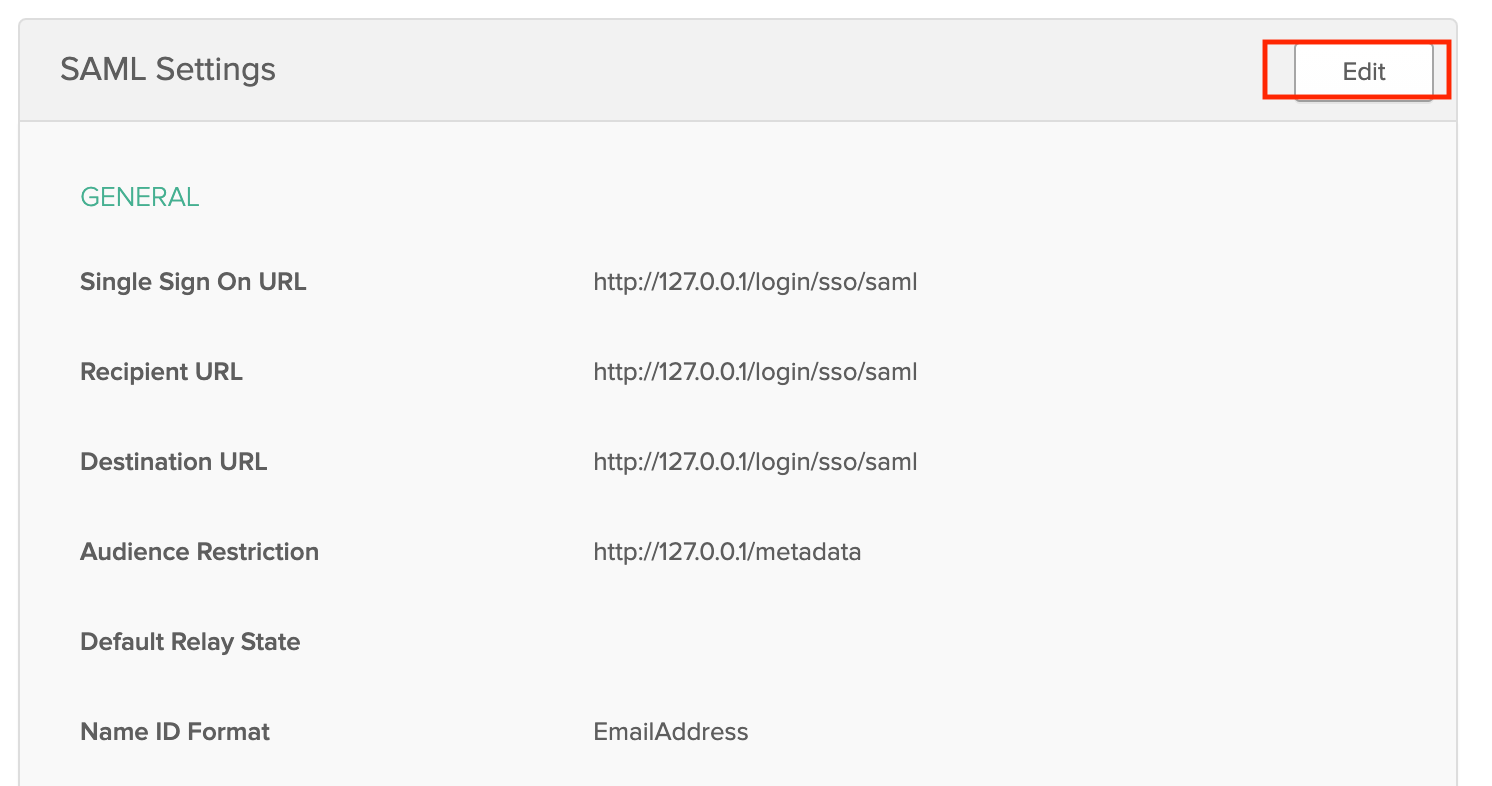
On the General page under SAML Settings,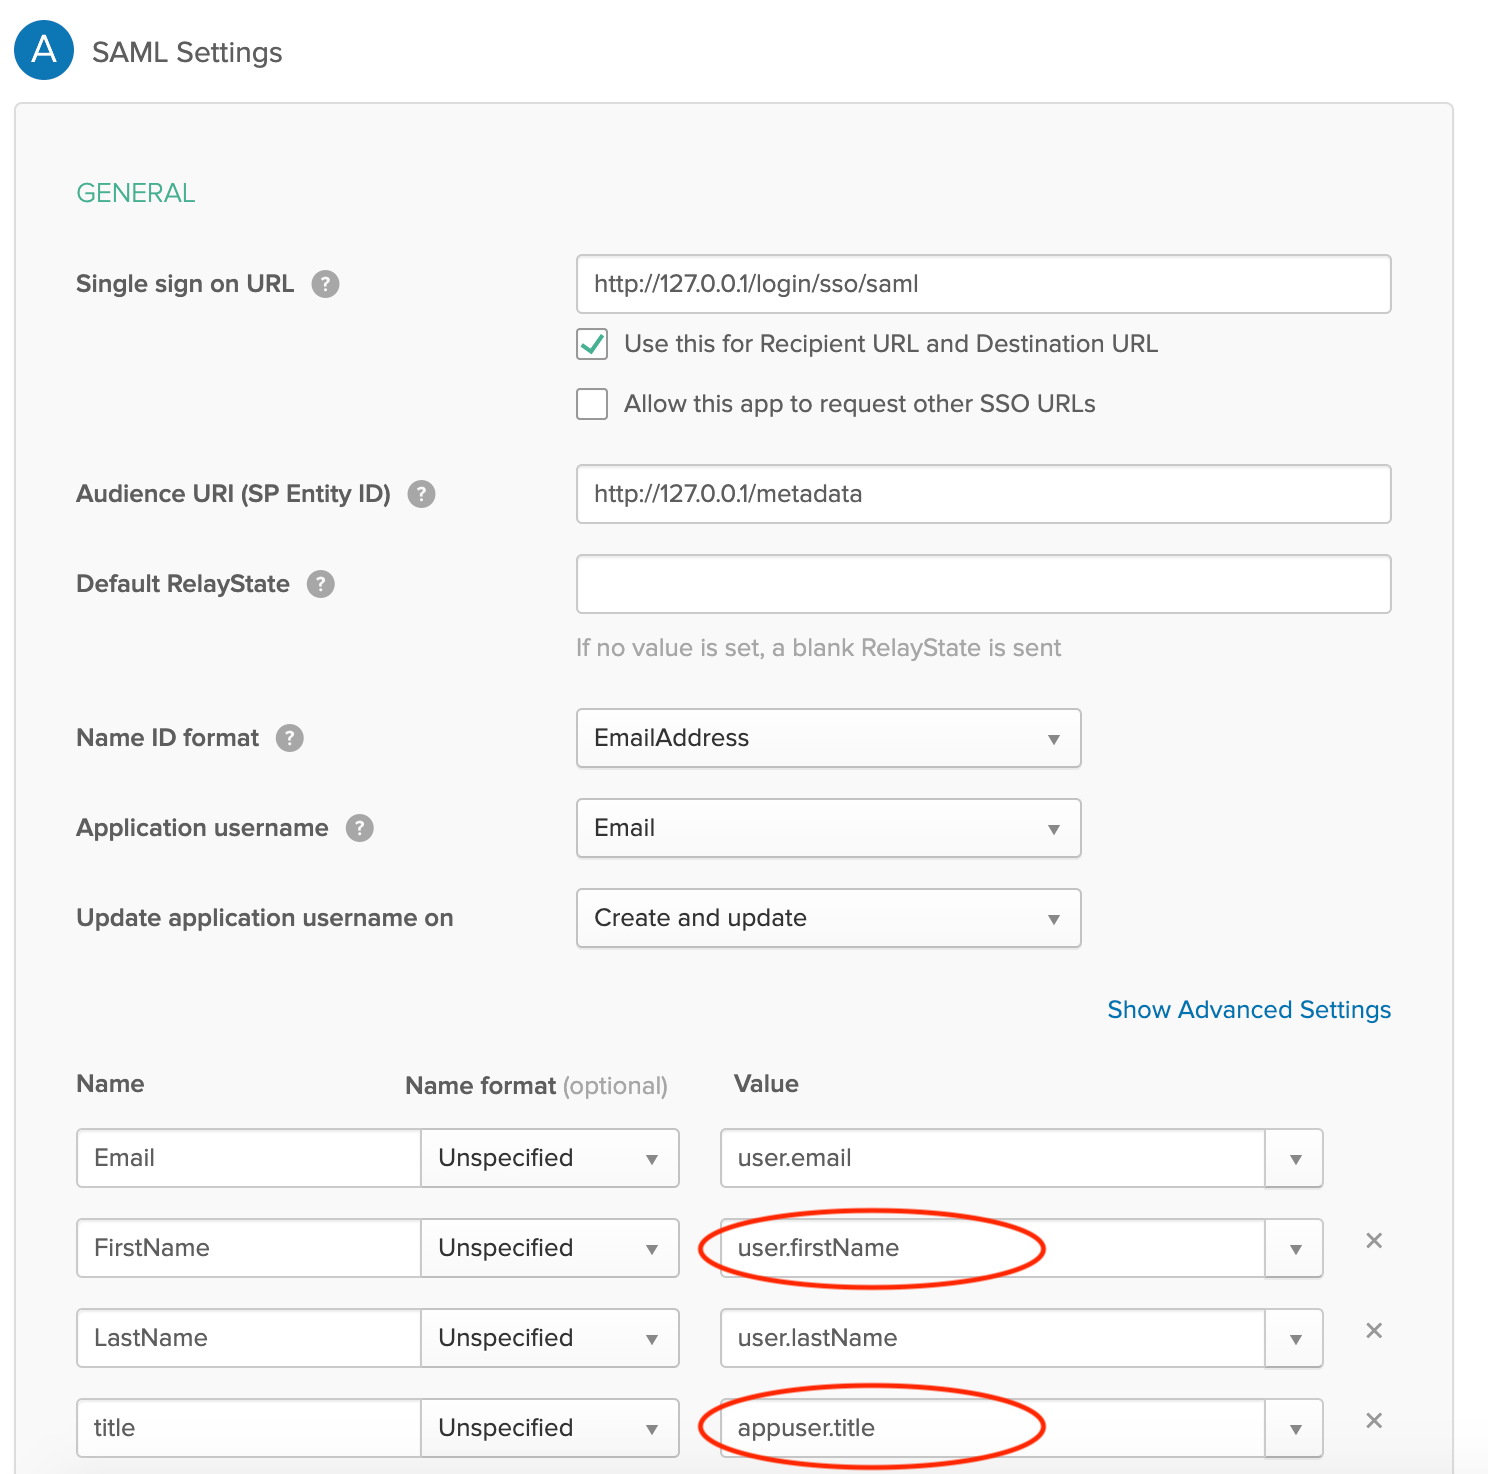
Click the Add Another button to create additional fields and set the values to the fields to appuser.{field_name you created from the previous step} if the fields are created in the previous step, otherwise, if it is preset or added in User

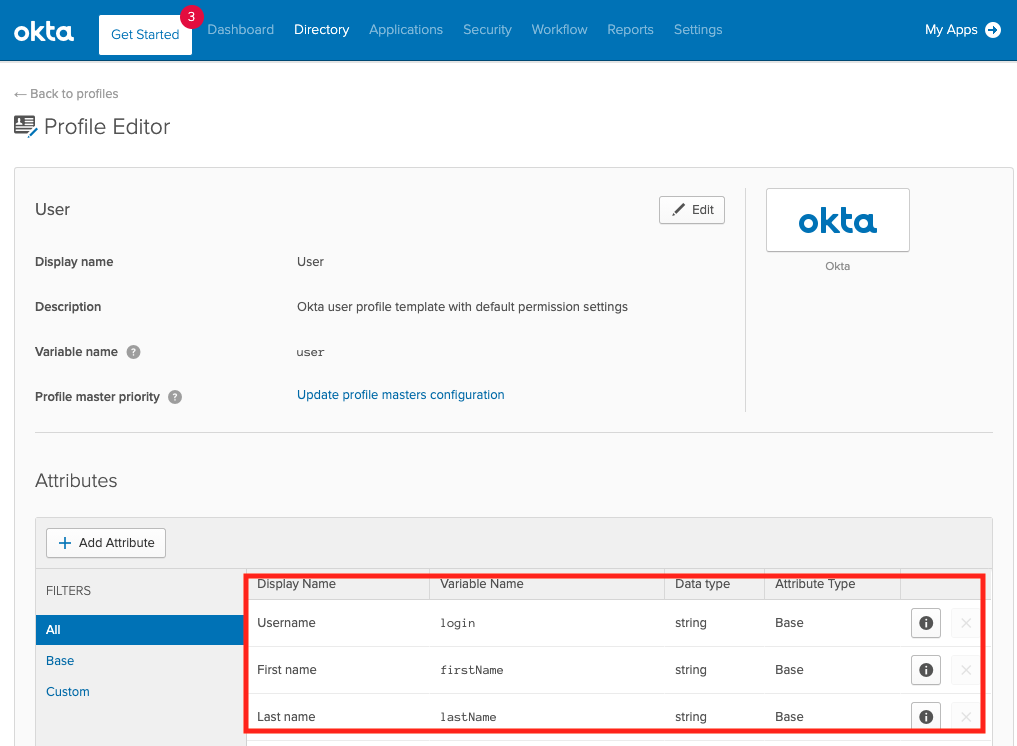
The value would be user.{field_name}.
Fill in the Additional Fields for each user
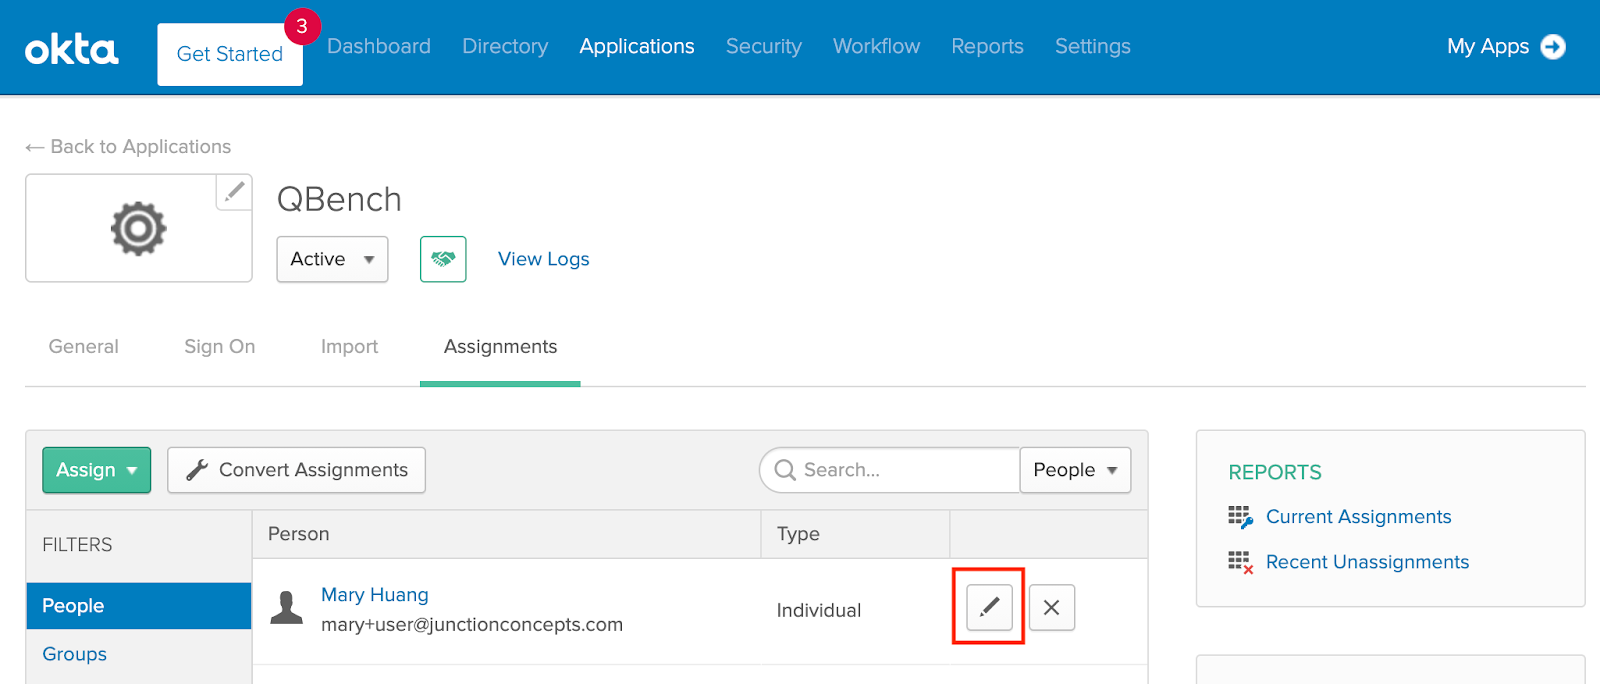
QBench
In User Settings under SSO tab, utilize SAML fields to QBench Fields Mapping to map SAML fields to QBench fields. If the fields needed aren’t present in QBench yet, the LIMS user can create additional fields in the Fields and Data Types page.

On the left hand side, select Insert(Append) > Object to create a new mapping field.
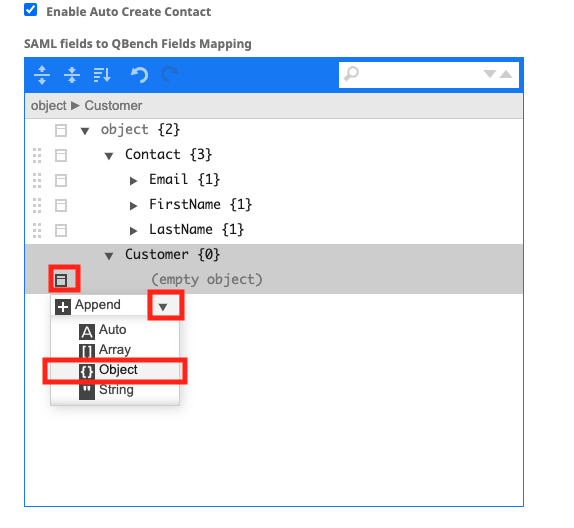
The key value for this object is the field name in SAML configuration. The LIMS user would then need to append a string like this field:{field_name in QBench}.
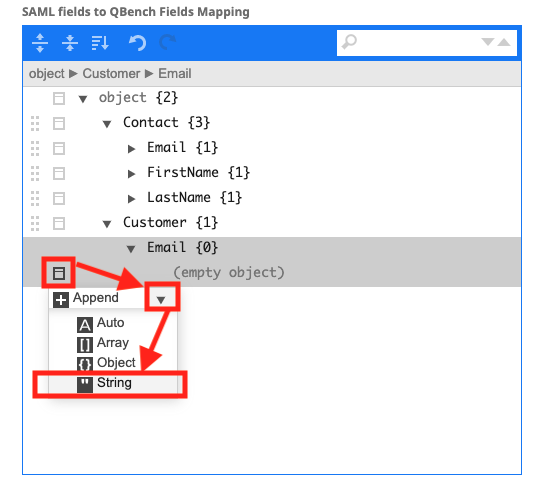
Multiple fields from SAML fields can be combined into one field in QBench by adding another string order:{the order this field should be presented in the QBench field}. For example, if the customer name would be {first name last name}, the order of first name field would be order:1 and the order of the last name field would be order:2.

Important Note: some of the QBench fields are preset, the field name for name field in Customer is customer_name, email field should be created in Customer and can be named as the LIMS user wishes. The field name for the email field in Contact is email_address, the field name for first and last name is first_name and last_name.

Other QBench field names can be found in the Fields and Data Types page.

Comments
0 comments
Please sign in to leave a comment.