QBench administrators can allow their Users to record data in Rich Text Fields for Orders, Samples, Tests, Sources, Projects, Epics, Batches, Assays, Panels, Customers, Invoices, Suppliers, Contacts, Equipment, Documents, Issue, Inventory Items, and Locations, which can be configured in Fields and Data Types Settings. Have Users who regularly need to enter specific information or use certain formatting in their Rich Text Fields? Help them save time and minimize errors by creating Rich Text Configurations, which are accessible in all Rich Text fields, as well as in the Test Free Response and Issue Root Cause editors.
Creating Rich Text Configurations
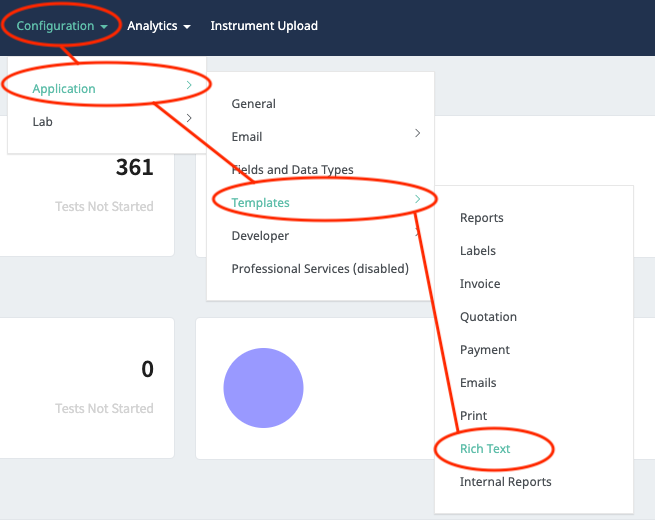
1. Login to QBench as an administrator
2. Click Configuration, hover over Application, then Templates, then click Rich Text
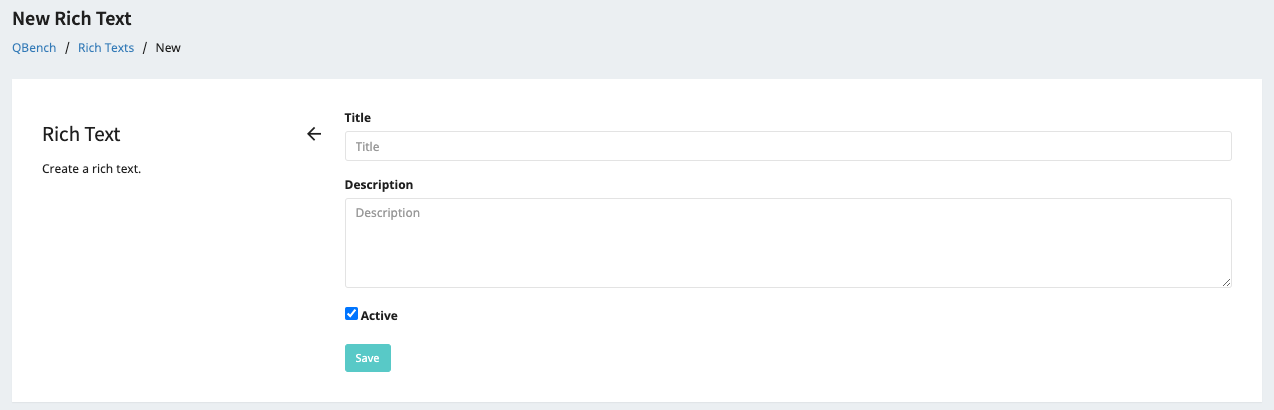
3. To create your first Rich Text Configuration, click the "New Rich Text Configuration" button
4. Enter a Title and option Description, then click the "Save" button
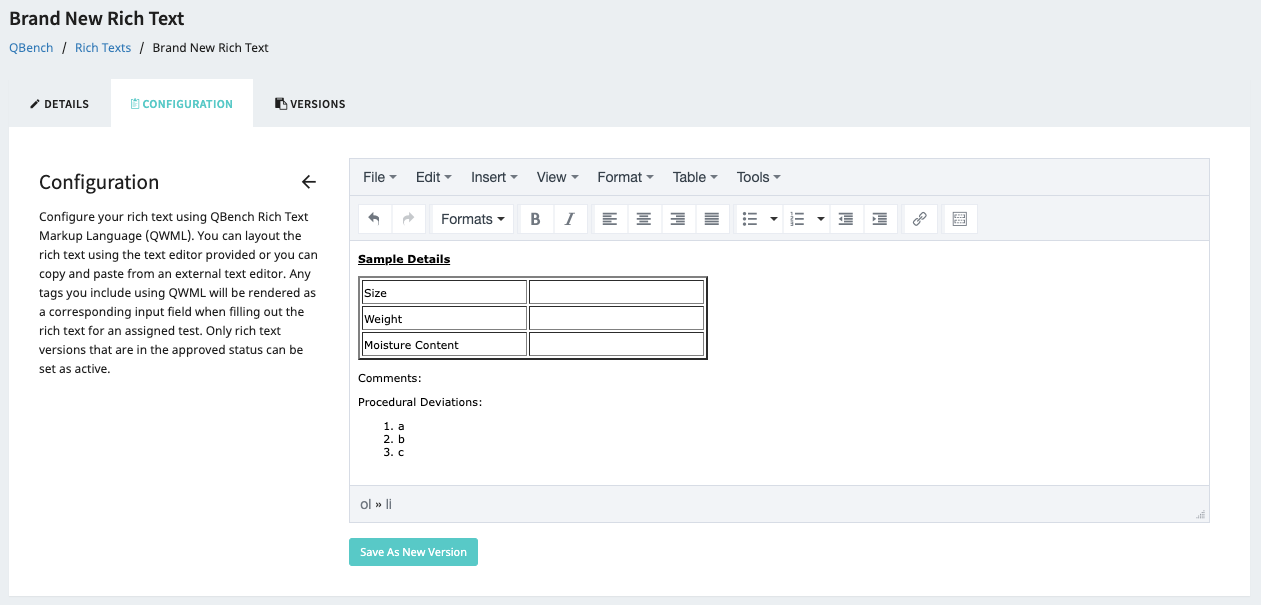
5. When your Rich Text Configuration saves, click the "Configuration" tab, where you will find the Rich Text editor
6. Copy and paste your template from an external text editor or create a brand new template in the Rich Text editor, then click the "Save As New Version" button
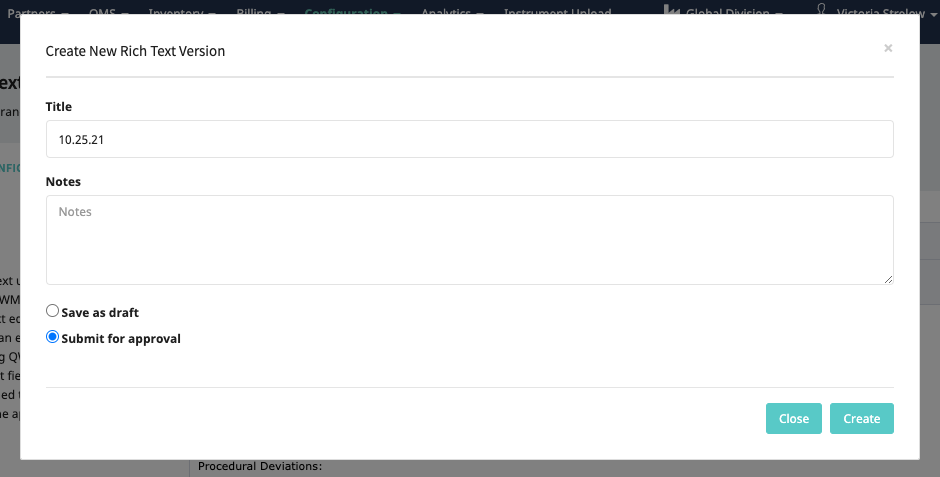
7. If you want to save your progress but not publish your template, click the "Save as draft" radio button, then click "Create". Otherwise, click the "Submit for approval" radio button, then click the "Create" button
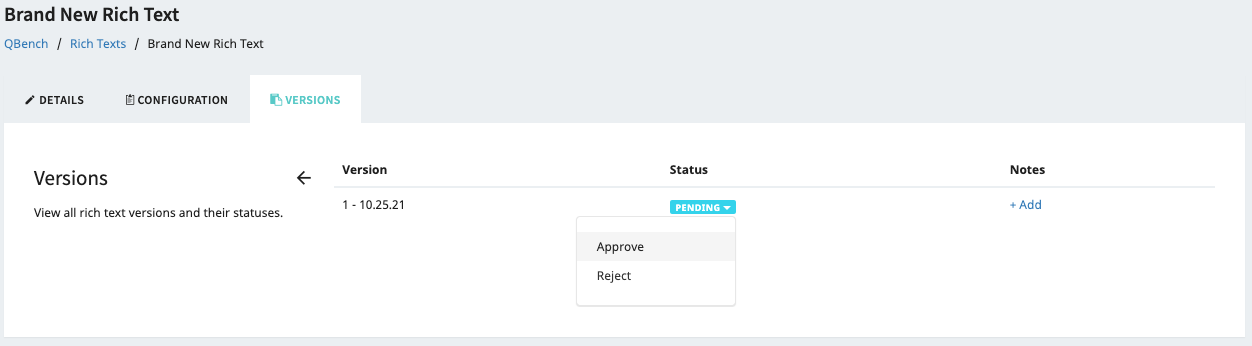
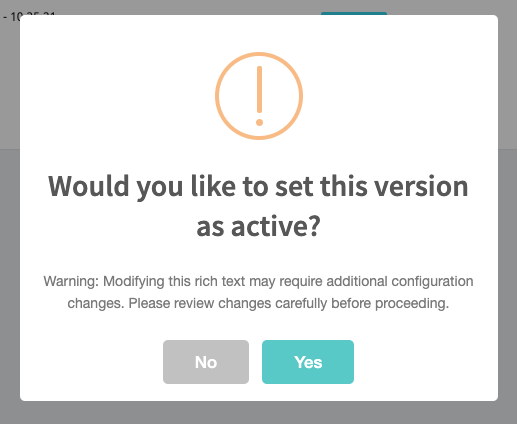
8. Click the "Versions" tab. If you're ready to have Users use your template, click the "Pending" dropdown, then click "Approve", click "Yes" on the Confirmation window, then click "Yes" to set this version of the template as the active version
9. Your Rich Text is ready for use!
Using Your Rich Text Configurations
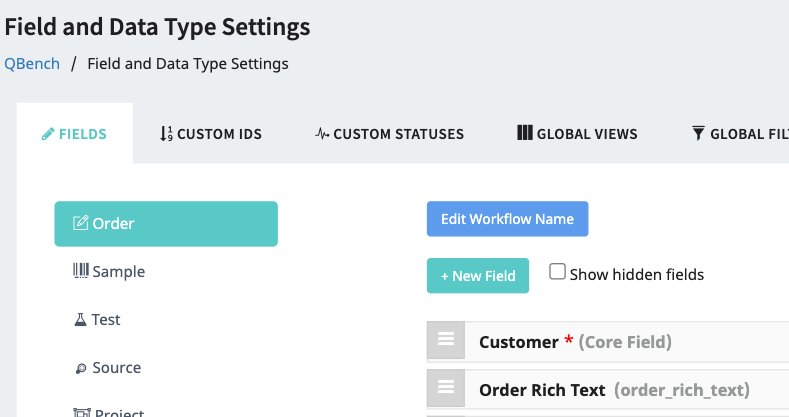
1. To use a Rich Text Configuration, create a Rich Text additional field in Fields and Data Types Settings. In this example, a Rich Text field has been created for Orders
2. Once your field is created, go to the logging page or detail page of that data type, or other places in QBench (such as the Test list page for Samples and Tests) where fields can be edited
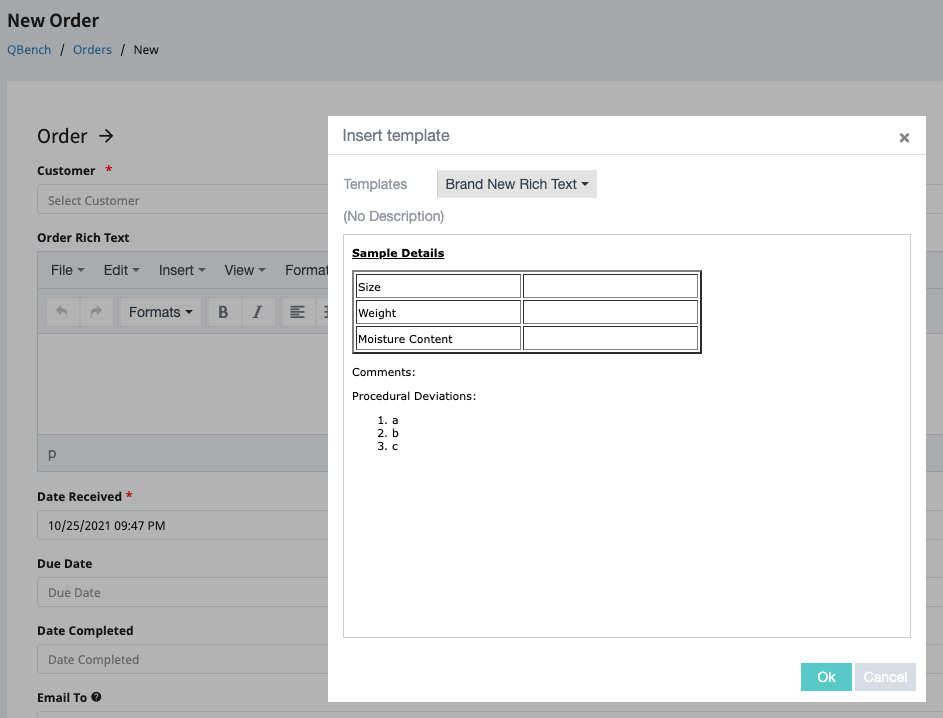
3. Click the "Insert Template" button to open the template selector. Select your desired template from the dropdown, then click "Ok"
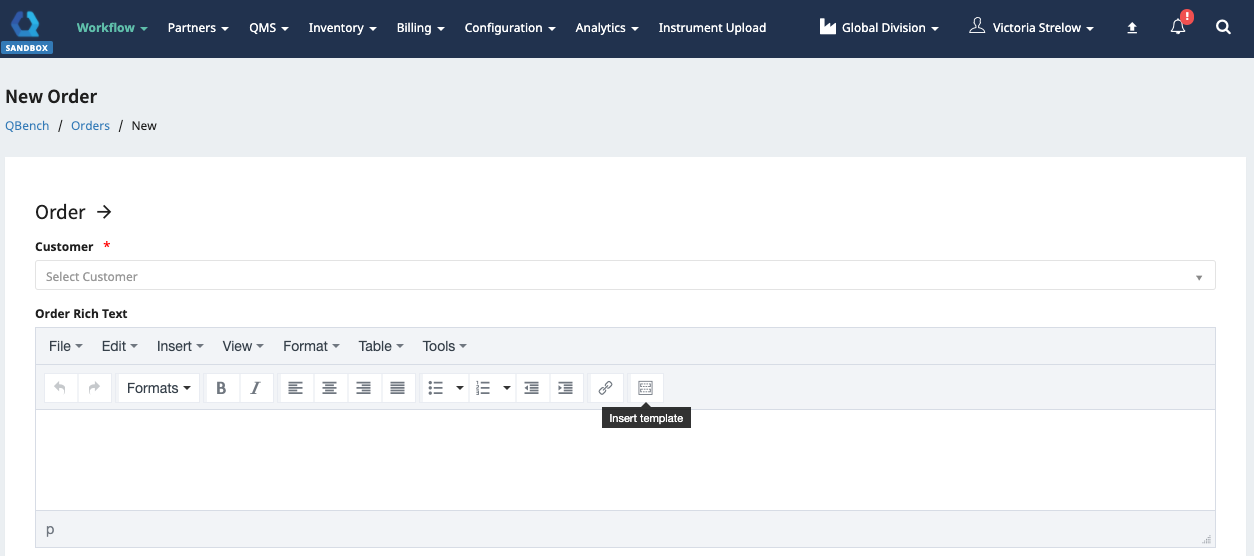
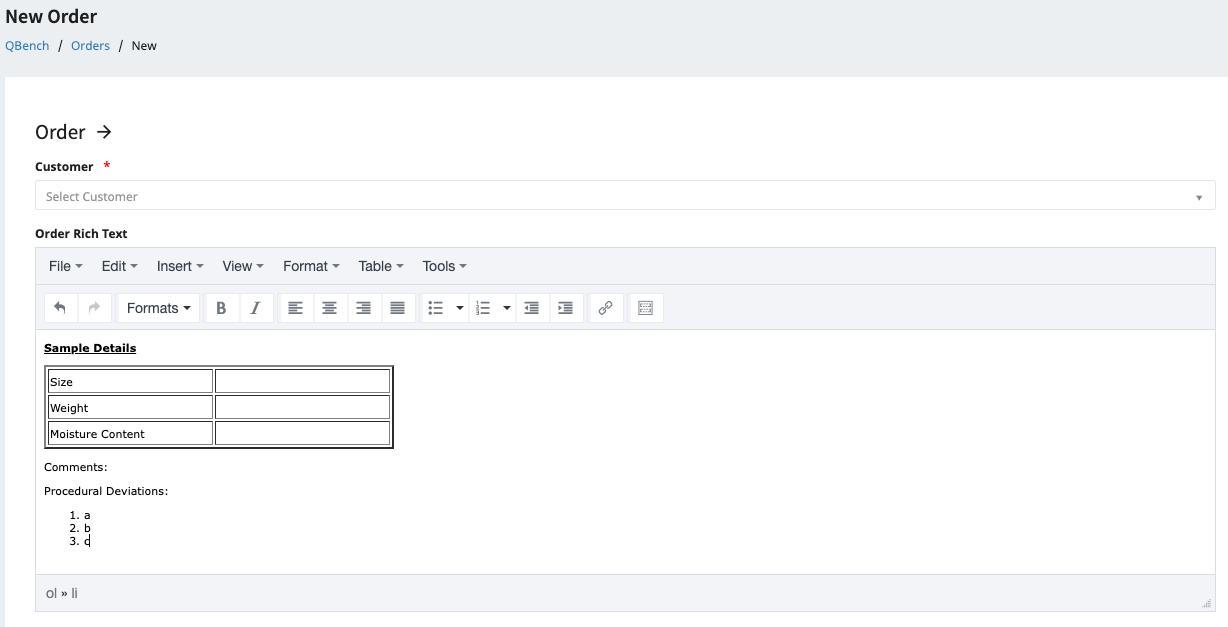
4. Your Rich Text template appears in the Rich Text field, and can be filled in or otherwise modified by your Users
Comments
0 comments
Please sign in to leave a comment.